November 20, 2020 NHTSA CAMPAIGN NUMBER: 20V724000
Front Seat Belt Webbing May Tear in a Crash
A torn seat belt may not adequately restrain the seat occupant during a crash, increasing their risk of injury.
NHTSA Campaign Number: 20V724
Manufacturer Volkswagen Group of America, Inc.
Components SEAT BELTS
Potential Number of Units Affected 10,835
Summary
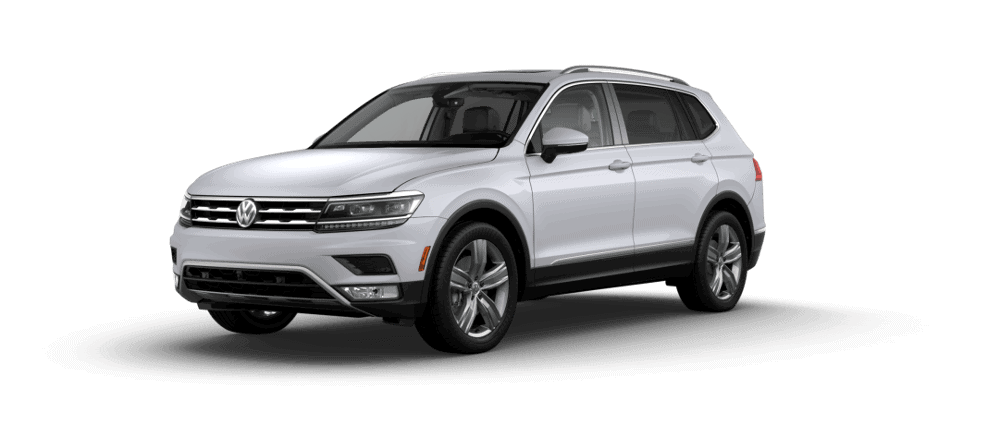
Volkswagen Group of America, Inc. (Volkswagen) is recalling certain 2018 Tiguan LWB vehicles. In the event of a crash, one or both of the front seat belt’s webbing may tear.
Remedy
Volkswagen will notify owners, and dealers will inspect the front seat belts and replace them as necessary, free of charge. The recall began April 13, 2021. Owners may contact Volkswagen customer service at 1-800-893-5298. Volkswagen’s number for this recall is 69BH.
Notes
Owners may also contact the National Highway Traffic Safety Administration Vehicle Safety Hotline at 1-888-327-4236 (TTY 1-800-424-9153), or go to www.safercar.gov.
Check if your Volkswagen has a Recall
Problem Description
During two (2) NHTSA New Car Assessment Program (NCAP) tests, the seat belts on the
front driver side of the Tiguan ruptured. A ruptured seat belt may increase the risk of injuries
in the event of a vehicle crash.
Corrective Action
Replace one or both front seat belts.
Code Visibility
On or about December 01, 2020 the campaign code was applied to affected vehicles.
Owner Notification Owner notification will take place in April 2021. Owner letter examples are included in this
bulletin for your reference.
Repair Overview
- Vehicles with Criteria 01 – replace left (driver) seat belt.
- Vehicles with Criteria 02 – replace right (passenger) seat belt.
- Vehicles with Criteria 03 – replaced left AND right seat belts.
Section B – Replacing Front Seat Belt
WARNING
Risk of injury. Refer to “Warning and Safety Precautions”, found in Appendix A at the end of this document.
NOTE
The following describes the removal and installation procedures on the left side (driver) of the vehicle. Removing and installing on the right side (passenger) is similar.
Remove front seat:
- Position the seat as far forward as possible using the forward/back adjustment.
- Remove the bolts <3 and 4>.
- Position the seat as far back as possible using the forward/back adjustment.
- Remove the bolts <1 and 2>.
- Tilt the seat back.
- Open the cover in the carpet.
- Depending on the vehicle equipment level, release and remove the wiring harnesses from the seat at the connector station.
- Connect the -VAS6282- to the thorax airbag wiring harness on the seat.
- Remove the seat from the vehicle.
Remove front sill panel:
- Detach the rear sill panel from the body in the transition area to the front sill panel.
- Release the front sill panel strip retaining tabs <1> from the lower B-pillar trim panel <2> using the -T10383- <arrow A>.
- Loosen the front sill panel <1> from the side sill and door seal molding using the -T10383- <B arrows>.
- Open the belt guide cover and guide the seat belt out.
- Guide the sill panel out of the vehicle.
Remove upper B-pillar trim panel:
- Move seat belt height adjuster to the lowest position.
- Starting at the bottom, disengage the B-pillar upper trim panel <1> at the door seal <arrow A> by placing the -T10383- on the front edge of the trim panel.
- Unclip the B-pillar upper trim panel <1> from the B-pillar lower trim panel <4> <B arrows> by placing the -T10383- on the lower edge of the trim panel.
CAUTION
For the following procedure, make sure that the Bpillar upper trim panel does not pivot too far inward, which could cause damage to the headliner.
- Remove the B-pillar upper trim panel <1> from the mount on the body <arrow C> by pivoting the trim panel slightly inward and pulling it downward.
- Guide the seat belt webbing with belt tongue out through the slide for the seat belt height adjuster, and then remove the upper B-pillar trim panel.
Remove lower B-pillar trim panel:
- Loosen the lower B-pillar trim panel <1> from the door seal molding.
- Loosen the lower B-pillar trim panel <1> near the clips from the body mounts using the Wedge Set -T10383-.
Disconnect the 12V battery with the ignition switched ON:
WARNING
Accident risk. When working on pyrotechnic components (such as airbags and belt tensioners), the battery must be disconnected with the ignition switched ON.
- Turn ON the ignition.
- Access the battery.
- Loosen the nut <3>.
- Remove and isolate the battery ground cable <2> from the battery terminal.
Remove front seat belt guide:
- Press the seat belt guide bracket <1> together in the direction of <a arrows>.
- At the same time, disengage the seat belt guide <1> downward from the body in the direction of <arrow b>.
- Remove the seat belt guide <1> upward with the bracket pushed together <arrow c>.
- Thread the seat belt webbing out and remove the seat belt guide <1>.
Remove seat belt:
WARNING
Before handling pyrotechnic components (for example, disconnecting the connector), the person handling it must “discharge static electricity”. This can be done by touching the door striker, for example.
- Disconnect the connector <6> by removing the connector lock.
- Remove the bolt <5> and nut <7>.
- Remove the belt end fitting <4> from the side sill.
- Disconnect the connectors <2> by removing the connector locks.
- Remove the bolt <3> and then remove the automatic belt retractor <1> from the mount.
Install new seat belt in the reverse order of removal:
- Torque the fasteners as follows:
3 = 40 Nm.
8 = 40 Nm.
9 = 40 Nm.
10 = 8 Nm.
- Connect and lock connectors.
- Install seat belt guide <5>.
Reinstall trim:
- Installation of the B-pillar trim and sill trim is the reverse order of removal.
- Remove any trim clamps remaining in the body using the -T40280-.
Reinstall front seat:
- Installation is the reverse order of removal.
- Torque seat bolts to 40 Nm.
Reconnect 12V battery:
WARNING
Ignition must be ON when connecting battery. If pyrotechnic components (e.g. airbag, belt tensioner) are not repaired correctly, they may deploy unintentionally after connecting battery. There must not be anyone inside the vehicle when connecting the battery.
- Disconnect the connector <2> from the Battery Monitoring Control Module -J367- <3> (if equipped).
- Attach the battery ground cable clamp by hand to the battery negative terminal and torque the nut <1> to 6 Nm.
- Reconnect the connector to the Battery Monitoring Control Module -J367- (if equipped).
- Cycle the ignition off and back on.
- Set clock to local time.
- Activate the convenience open/close functions.
- Check the DTC memories of all the control units and erase under-voltage faults if necessary.
NOTE
- After connecting the battery and switching on the ignition, the ASR/ESP Control Lamp -K155- and Electromechanical Power Steering Indicator Lamp light up continuously. The indicator lamps switch off automatically after driving a short distance (less than 100 meters). This activates Steering Angle Sensor -G85-.
- Once -G85- is activated and the ignition is cycled, the Start/Stop function will also start working again and any faults related to the battery being disconnected should be able to be cleared.
Appendix A – Warning and Safety Precautions
WARNING
General
- Testing, assembly, and repair work may only be performed by qualified personnel.
- There is no change interval for airbag units.
- Never test with a test light, volt meter or ohm meter.
- The pyrotechnic components may be checked only when they are installed and with a vehicle diagnostic tester approved by the manufacturer.
- When working on pyrotechnic components and on the Airbag Control Module -J234-, the battery ground cable must be disconnected when the ignition is switched on. Then cover the negative terminal.
- Wait for 10 seconds after disconnecting the battery.
- The ignition must be SWITCHED ON when connecting the battery. Nobody should be inside the vehicle when doing this.
- If the ignition is not switched on after the battery is reconnected – “indicator lamps in the instrument cluster do not light up” – the ignition (key/button) may only be switched on when the driver seat is positioned all the way back.
- Follow the steps after connecting the battery. Refer to → Electrical Equipment; Rep. Gr.27.
- The technician must discharge static electricity before handling pyrotechnic components for the restraint system, for example, before disconnecting the connector. Touching grounded metal parts will discharge the static electricity, for example by touching the door striker.
- Wash hands after touching ignited restraint system pyrotechnic components.
- Pyrotechnic components may not be opened nor repaired; always use new parts (risk of injury).
- Pyrotechnic components that have fallen onto a hard surface or show signs of damage must not be installed in the vehicle.
- Pyrotechnic components should be installed immediately upon removal from shipping package.
- If the procedure must be stopped for awhile, put the pyrotechnic component back into its shipping package.
- It is not permitted to leave a pyrotechnic component out unattended.
- When connecting the restraint system pyrotechnic components, only the person performing the work should be in the vehicle.
- Do not use any grease, cleaning solutions or similar substance on pyrotechnic components.
- Replace the airbag unit if any contaminants such as oil, grease, paint, dye or solvents have penetrated the fabric.
- Pyrotechnic components must not be exposed to temperatures over 100 °C, even for a short time.
WARNING
Special Information Regarding Belt Tensioners
- Use extreme care when removing and installing belt tensioner units. Improper handling of belt tensioner units is very dangerous and could result in serious personal injury.
- Belt tensioner units that are mechanically damaged (dents, cracks) must always be replaced.
- The open end of the belt tensioner should never be pointed at anyone.
- When connecting a belt tensioner, all mechanical parts, including those in the three-point seat belt, must be secured correctly. If it is not possible to connect the belt tensioner because of insufficient space, the seat belt webbing must be rolled up completely prior to connection. In this case there is no increased safety risk, if all other safety instructions are followed. This particularly includes the notes regarding the disconnection of the battery and the static discharging of the technician prior to connecting the belt tensioner.
- Even after a crash, it is possible that the belt tensioner ignited, but the seat belt force limiter did NOT. Treat these components as if they had not ignited.
Chronology of Defect
December 2017: Two seat belt ruptures occurred at two NCAP tests conducted by NHTSA. Analysis and testing initiated.
January 10, 2018: NHTSA opened a PE regarding the two occurrences.
Beginning January 2018, Volkswagen started intensive testing in order to understand what may have caused the seat belt ruptures in the two NHTSA NCAP tests. This included a series of sled tests and full vehicle crash tests. An outside influence was considered as the most likely cause of the results in the two NHTSA NCAP tests.
July 03, 2018: NHTSA upgraded the PE to an EA. Volkswagen continued with its analysis and testing.
July 2018 – May 2020: Ongoing investigation and field monitoring showed no evidence of any problems with seat belt performance in the field or other internal testing.
June 01, 2020: Volkswagen received an IR letter from NHTSA to further investigate this topic.
July 2020 – October 2020: As part of the ongoing analysis, Volkswagen conducted additional testing (sled tests, vehicles crash tests, simulations, field parts analysis) in order to understand the results of the two NHTSA NCAP tests in 2017 and to identify potential additional contributers that may have influenced the test result in the two NCAP tests in 2017. November 03, 2020: Volkswagen presented its findings to NHTSA.
November 11, 2020: Topic was presented to Volkswagen’s Product Safety Committee. No final root cause determination could be identified. All other vehicle tests (release tests, NCAP tests, FMVSS 208 tests) for the Tiguan were successful and did not result in a seat belt rupture. No field events with a seat belt rupture are known for the Tiguan. Volkswagen believes that an outside influence most likely caused the results observed in the two NCAP tests conducted in 2017. Volkswagen could not identify a final root cause for the seat belt ruptures but believes an outside influence may have contributed to the seat belt ruptures in the two 2017 NHTSA NCAP tests. These ruptures differ from several other NCAP-style tests run by Volkswagen in which the seat belts perform well. Nevertheless, out of an abundance of caution, and to exclude influence on the seat belt performance due to potential deviations in the production lot of the seat belts of the Tiguan vehicles tested by NHTSA NCAP, Volkswagen proposed a recall of vehicles built with seat belt assemblies out from the same seat belt production lot as the tested vehicles.
November 17, 2020: Volkswagen briefs NHTSA Office of Defect Investigations on the proposed recall. NHTSA requested meeting to discuss.
November 20, 2020: Volkswagen presented topic to NHTSA Office of Defects Investigations. Decision to proceed with the recall was made.
SEOCONTENT-START
TOPIC TYPE
RECALL
CODE QUESTION ANSWER
Safety
Recall
69BH
Safety
Recall 69BH
What vehicles are
included in Safety
Recall 69BH?
What is the safety
concern for Safety
Recall 69BH?
During two (2) NHTSA New Car
Assessment Program (NCAP) tests, the
seat belts on the front driver side of the
Tiguan ruptured. A ruptured seat belt
may increase the risk of injuries in the
event of a vehicle crash.
What is the repair
for Safety Recall
69BH?
Your authorized Volkswagen dealer will
replace one or both front seat belts.
When will the
repair for Safety
Recall 69BH be
available?
Parts are available now and repairs have
begun. Please contact your authorized
Volkswagen dealer without delay to
schedule this recall repair. To set up an
appointment online, please visit
www.vw.com/find-a-dealer.
************************************************************************************************************
NAME
Title
Department
Phone
Fax
Date
Dear Mr. Owens:
Volkswagen hereby submits the following chronology associated with the subject recall.
Chronology of Defect
December 2017: Two seat belt ruptures occurred at two NCAP tests conducted by NHTSA. Analysis and testing initiated.
January 10, 2018: NHTSA opened a PE regarding the two occurrences.
Beginning January 2018, Volkswagen started intensive testing in order to understand what may have caused the seat belt ruptures in the two NHTSA NCAP tests. This included a series of sled tests and full vehicle crash tests. An outside influence was considered as the most likely cause of the results in the two NHTSA NCAP tests.
July 03, 2018: NHTSA upgraded the PE to an EA. Volkswagen continued with its analysis and testing.
July 2018 – May 2020: Ongoing investigation and field monitoring showed no evidence of any problems with seat belt performance in the field or other internal testing.
June 01, 2020: Volkswagen received an IR letter from NHTSA to further investigate this topic.
July 2020 – October 2020: As part of the ongoing analysis, Volkswagen conducted additional testing (sled tests, vehicles crash tests, simulations, field parts analysis) in order to understand the results of the two NHTSA NCAP tests in 2017 and to identify potential additional contributers that may have influenced the test result in the two NCAP tests in 2017.
November 03, 2020: Volkswagen presented its findings to NHTSA.
November 11, 2020: Topic was presented to Volkswagen’s Product Safety Committee. No final root cause determination could be identified. All other vehicle tests (release tests, NCAP tests, FMVSS 208 tests) for the Tiguan were successful and did not result in a seat belt rupture. No field events with a seat belt rupture are known for the Tiguan. Volkswagen believes that an outside influence most likely caused the results observed in the two NCAP tests conducted in 2017. Volkswagen could not identify a final root cause for the seat belt
James C. Owens, Acting Administrator
National Highway Traffic Safety Administration
1200 New Jersey Avenue, S.E.
Washington, DC 20590
Subject: Chronology for Volkswagen Recall 69BH
Front Seat Belts
Christopher T. Sandvig
Director
Group Customer Protection
248-754-5000
248-754-5093
November 20, 2020
ruptures but believes an outside influence may have contributed to the seat belt ruptures in the two 2017 NHTSA NCAP tests. These ruptures differ from several other NCAP-style tests run by Volkswagen in which the seat belts perform well. Nevertheless, out of an abundance of caution, and to exclude influence on the seat belt performance due to potential deviations in the production lot of the seat belts of the Tiguan vehicles tested by NHTSA NCAP, Volkswagen proposed a recall of vehicles built with seat belt assemblies out from the same seat belt production lot as the tested vehicles.
November 17, 2020: Volkswagen briefs NHTSA Office of Defect Investigations on the proposed recall. NHTSA requested meeting to discuss.
November 20, 2020: Volkswagen presented topic to NHTSA Office of Defects Investigations. Decision to proceed with the recall was made.
Please contact me if you require any additional information or have any questions related to this information.
Sincerely,
Christopher T. Sandvig
Director, Group Customer Protection
Group Quality
************************************************************************************************************
TOPIC TYPE
RECALL
CODE QUESTION ANSWER
Safety
Recall
69BH
Safety
Recall 69BH
What vehicles are
included in Safety
Recall 69BH?
What is the safety
concern for Safety
Recall 69BH?
During two (2) NHTSA New Car
Assessment Program (NCAP) tests, the
seat belts on the front driver side of the
Tiguan ruptured. A ruptured seat belt may
increase the risk of injuries in the event of
a vehicle crash.
What is the repair
for Safety Recall
69BH?
Your authorized Volkswagen dealer will
replace one or both front seat belts.
When will the repair
for Safety Recall
69BH be available?
Parts are available now and repairs have
begun. Please contact your authorized
Volkswagen dealer without delay to
schedule this recall repair. To set up an
appointment online, please visit
www.vw.com/find-a-dealer.
************************************************************************************************************
Volkswagen of America, Inc., 3800 Hamlin Road, Auburn Hills, MI 48326
If you should have any questions about this communication, please reach out to us using your preferred method of communication at
www.vw.com/contact or by calling us at 800-893-5298. If you still cannot obtain satisfaction, you may file a complaint with: The Administrator,
National Highway Traffic Safety Administration, 1200 New Jersey Avenue, SE., Washington, DC 20590; or call the toll-free Vehicle Safety
Hotline at 1-888-327-4236 (TTY: 1-800-424-9153); or go to https://www.safercar.gov.
To check your vehicle’s eligibility for repair under this or any other recall/service campaign, please visit www.vw.com/owners/recalls and enter
your Vehicle Identification Number (VIN) into the Recall/Service Campaign Lookup tool.
If you are the lessor and registered owner of the vehicle identified in this action, the law requires you to forward this letter immediately via firstclass
mail to the lessee within ten (10) days of receipt. If you have changed your address or sold the vehicle, please fill out the enclosed
prepaid Owner Reply card and mail it to us so we can update our records.
69BH USA
Form No. F_3.4_AHQ-CP-C_054 Rev. 4.0
IMPORTANT SAFETY RECALL
<MONTH YEAR>
<CUSTOMER NAME>
<CUSTOMER ADDRESS>
<CUSTOMER CITY STATE ZIPCODE>
This notice applies to your vehicle:
<VIN>
<MODELYEAR> <BRAND> <MODEL>
NHTSA: 20V724
Volkswagen Recall: 69BH – Front Seat Belts
INTERIM SAFETY RECALL NOTICE FOR YOUR VEHICLE
A recall repair is not yet available
This notice is sent to you in accordance with the National Traffic and Motor Vehicle Safety Act. Volkswagen has
decided that a defect, which relates to motor vehicle safety, exists in certain Volkswagen vehicles. Our records show
that you are the owner of a vehicle affected by this action.
Why we sent you this
letter.
This is an interim safety recall notice about a recall for your vehicle. It contains
important information you need to know, even though a repair is not yet available.
Please share this letter with everyone who drives your vehicle.
About this recall: During two (2) NHTSA New Car Assessment Program (NCAP) tests, the seat belts on
the front driver side of the Tiguan ruptured. A ruptured seat belt may increase the risk
of injuries in the event of a vehicle crash.
A recall repair is not yet
available.
We will send another letter as soon as the recall work can be completed on your
vehicle. The recall repair is expected to become available in May 2021, once parts
supply permits.
What you can do now: Please do not contact your dealer about this recall; they do not yet have the parts
available to schedule this recall repair for you. As always, if you are experiencing any
issues with your vehicle, please reach out to your authorized Volkswagen dealer for
assistance.
Your safety and that of your passengers is our highest priority, and we are working to make a recall repair available
as soon as possible. We apologize for any inconvenience this letter may cause.
Sincerely,
Volkswagen Customer Protection
Volkswagen of America, Inc., 3800 Hamlin Road, Auburn Hills, MI 48326
Si tiene alguna pregunta sobre este comunicado, póngase en contacto con nosotros mediante su medio de comunicación preferido en
www.vw.com/contact o por teléfono al 800-893-5298. Si aún no obtuvo una respuesta satisfactoria, puede presentar una queja en la
siguiente dirección: The Administrator, National Highway Traffic Safety Administration, 1200 New Jersey Avenue, SE., Washington, DC
20590. También puede llamar a la línea directa gratuita de seguridad vehicular al 1-888-327-4236 (TTY: 1-800-424-9153), o bien ingresar a
https://www.safercar.gov.
Si desea comprobar la elegibilidad de su vehículo para una reparación en el marco de esta o de cualquier otra campaña de llamada a revisión
o de servicio, visite www.vw.com/owners/recalls e ingrese el número de identificación del vehículo (VIN) en la herramienta Recall/Service
Campaign Lookup (Búsqueda de campañas de llamada a revisión o de servicio).
Si usted es el arrendador y propietario registrado del vehículo identificado en esta campaña, la ley exige que reenvíe esta carta de inmediato
al arrendatario por correo de primera clase en el plazo de diez (10) días a partir de su recepción. Si cambió su dirección o vendió el vehículo,
complete la tarjeta prepagada de respuesta del propietario que se encuentra adjunta y envíenosla para que podamos actualizar nuestros
registros.
69BH EE. UU.
Formulario No. F_3.4_AHQ-CP-C_054 Rev. 4.0
CAMPAÑA DE LLAMADA A REVISIÓN IMPORTANTE
<MES AÑO>
<NOMBRE DEL CLIENTE>
<DIRECCIÓN DEL CLIENTE>
<CIUDAD, ESTADO Y CÓDIGO POSTAL DEL
CLIENTE>
El presente aviso corresponde a su vehículo:
<NÚMERO DE IDENTIFICACIÓN DEL VEHÍCULO>
<AÑO DEL MODELO> <MARCA> <MODELO>
NHTSA: 20V724
Campaña de llamada a revisión de Volkswagen: 69BH –
Cinturones de los asientos delanteros
AVISO DE CAMPAÑA DE LLAMADA A REVISIÓN PROVISIONAL DE SU VEHÍCULO
El servicio de reparación aún no está disponible
El presente aviso se le envía de acuerdo con la Ley Nacional de Tráfico y Seguridad con Vehículos Motorizados de
EE. UU. Volkswagen determinó que existe un defecto relacionado con la seguridad de los vehículos motorizados en
determinados vehículos Volkswagen. Nuestros registros indican que usted es propietario(a) de uno de los vehículos
afectados por esta medida.
Por qué le enviamos
esta carta.
Este es un aviso de campaña de llamada a revisión provisional sobre un servicio de
reparación para su vehículo. Contiene información importante que debe conocer,
aunque todavía no haya una reparación disponible. Comparta esta carta con todos los
que conducen su vehículo.
Acerca de esta campaña
de llamada a revisión:
Durante dos (2) pruebas del Programa de Evaluación de Automóviles Nuevos (NCAP)
de la NHTSA, se rompieron los cinturones del asiento del conductor delantero del
Tiguan. La ruptura del cinturón de seguridad puede aumentar el riesgo de sufrir
lesiones en caso de un accidente automovilístico.
El servicio de
reparación aún no está
disponible.
Enviaremos otra carta tan pronto como pueda realizarse el servicio de reparación en
su vehículo. Se espera que este servicio de reparación esté disponible en mayo del
2021, una vez que el suministro de piezas lo permita.
Qué puede hacer ahora: No se comunique con su concesionario sobre esta reparación, ellos aún no cuentan
con las piezas necesarias para programar esta reparación para usted. Como siempre,
si tiene algún problema con su vehículo, póngase en contacto con su concesionario
Volkswagen autorizado para obtener ayuda.
Su seguridad y la de sus pasajeros es nuestra prioridad principal y estamos trabajando para que haya un servicio
de reparación disponible cuanto antes. Nos disculpamos por cualquier inconveniente que esta carta pueda
causarle.
Atentamente,
Defensa del Consumidor de Volkswagen
************************************************************************************************************
The repair information in this document is intended for use only by skilled technicians who have the proper tools, equipment and training to correctly and safely maintain your vehicle. These
procedures are not intended to be attempted by “do-it-yourselfers,” and you should not assume this document applies to your vehicle, or that your vehicle has the condition described. To
determine whether this information applies, contact an authorized Volkswagen dealer. 2021 Volkswagen Group of America, Inc. and Volkswagen Canada. All Rights Reserved.
April 2021 69BH Page 1 of 18
Safety Recall
Code: 69BH
Subject Front Seat Belts
Release Date April 13, 2021
Affected Vehicles Country Beginning
Model Year
Ending
Model Year Vehicle Vehicle
Count
USA 2018 2018 TIGUAN 10,835
CAN 2018 2018 TIGUAN 1,678
Check Campaigns/Actions screen in ELSA on the day of repair to verify that a VIN qualifies for repair
under this action. ELSA is the only valid campaign inquiry & verification source.
Campaign status must show “open.”
If ELSA shows other open action(s), inform your customer so that the work can also be
completed at the same time the vehicle is in the workshop for this campaign.
Problem Description During two (2) NHTSA New Car Assessment Program (NCAP) tests, the seat belts on the
front driver side of the Tiguan ruptured. A ruptured seat belt may increase the risk of injuries
in the event of a vehicle crash.
Corrective Action Replace one or both front seat belts.
Code Visibility On or about December 01, 2020 the campaign code was applied to affected vehicles.
Owner Notification Owner notification will take place in April 2021. Owner letter examples are included in this
bulletin for your reference.
Additional Information Please alert everyone in your dealership about this action, including Sales, Service,
Parts and Accounting personnel. Contact Warranty if you have any questions.
IMPORTANT REMINDER ON VEHICLES AFFECTED BY SAFETY & COMPLIANCE RECALLS
New Vehicles in Dealer Inventory: It is a violation of federal law for a dealer to deliver a
new motor vehicle or any new or used item of motor vehicle equipment (including a tire)
covered by this notification under a sale or lease until the defect or noncompliance is
remedied. By law, dealers must correct, prior to delivery for sale or lease, any vehicle
that fails to comply with an applicable Federal Motor Vehicle Safety Standard or that
contains a defect relating to motor vehicle safety.
Pre-Owned Vehicles in Dealer Inventory: Dealers should not deliver any pre-owned
vehicles in their inventory which are involved in a safety or compliance recall until the
defect has been remedied.
Dealers must ensure that every affected inventory vehicle has this campaign completed
before delivery to consumers.
Fill out and affix Campaign Completion Label (CAMP 010 000) after work is complete.
Labels can be ordered at no cost via the Compliance Label Ordering portal at
www.vwhub.com.
The repair information in this document is intended for use only by skilled technicians who have the proper tools, equipment and training to correctly and safely maintain your vehicle. These
procedures are not intended to be attempted by “do-it-yourselfers,” and you should not assume this document applies to your vehicle, or that your vehicle has the condition described. To
determine whether this information applies, contact an authorized Volkswagen dealer. 2021 Volkswagen Group of America, Inc. and Volkswagen Canada. All Rights Reserved.
April 2021 69BH Page 2 of 18
Parts Information
Parts Control Type:
Upper Order Limit
Parts will be managed with a weekly Upper Order Limit. Please see Parts On
Command (POC) for your Upper Order Limit quantity.
Initial Allocation:
NO
There will be no parts allocation. Please reference the Repair Projection Tool (below)
to view your potential VIN population.
Repair Projection Tool:
(right click to open)
Criteria Quantity Part Number P.O.C. Part Description Ordering Method
01 1 5NN-857-705 RAA Seat Belt (left) UOL
02 1 5NN-857-706-B RAA
Seat belt (right)
UOL
03 Vehicles with criteria 03 receive a left and right seat belt as shown above
NOTE
The specified part numbers reflect the status at the start of this action. Interim updates made in ETKA can cause a
listed part number to become unavailable. In this case, the new part number specified in ETKA should be used.
The repair information in this document is intended for use only by skilled technicians who have the proper tools, equipment and training to correctly and safely maintain your vehicle. These
procedures are not intended to be attempted by “do-it-yourselfers,” and you should not assume this document applies to your vehicle, or that your vehicle has the condition described. To
determine whether this information applies, contact an authorized Volkswagen dealer. 2021 Volkswagen Group of America, Inc. and Volkswagen Canada. All Rights Reserved.
April 2021 69BH Page 3 of 18
Claim Entry Instructions
The labor times listed here may differ from the labor operations and labor times listed in ELSA.
After campaign has been completed, enter claim as soon as possible to help prevent work from being duplicated
elsewhere. Attach the ELSA screen print showing action open on the day of repair to the repair order.
If customer refused campaign work:
U.S. dealers: Submit request via WISE under the Campaigns/Update/Recall Closure option.
Canada dealers: Upload the repair order [signed by customer] to Volkswagen WIN/Operations/Campaign
Closure.
Service Number 69BH
Damage Code 0099
Parts Vendor Code WWO
Claim Type Sold vehicle: 7 10
Unsold vehicle: 7 90
Causal Indicator Mark seat belt* as causal part
Vehicle Wash/Loaner Do not claim wash/loaner under this action
U.S.A.: Loaner/rental coverage cannot be claimed under this action. However,
loaner/rental may be covered under the Alternate Transportation Program. Please refer
to the Volkswagen Warranty Policy and Procedures Manual for loaner claims
information and reimbursement details.
Canada: Loaner/rental coverage cannot be claimed under this action. Please refer to the
Volkswagen Service Loaner Program to determine loaner eligibility.
Criteria I.D. 01
LABOR
Labor Op Time Units Description
6911 55 99 130 Replace driver seat belt
0150 00 50
Time stated on
diagnostic protocol
(up to 20 TU)
Clear repair related faults
PARTS
Quantity Part Number Description
1.00 5NN857705 RAA Seat Belt (driver)*
Continued on next page
The repair information in this document is intended for use only by skilled technicians who have the proper tools, equipment and training to correctly and safely maintain your vehicle. These
procedures are not intended to be attempted by “do-it-yourselfers,” and you should not assume this document applies to your vehicle, or that your vehicle has the condition described. To
determine whether this information applies, contact an authorized Volkswagen dealer. 2021 Volkswagen Group of America, Inc. and Volkswagen Canada. All Rights Reserved.
April 2021 69BH Page 4 of 18
Criteria I.D. 02
LABOR
Labor Op Time Units Description
6911 55 99 130 Replace passenger seat belt
0150 00 50
Time stated on
diagnostic protocol
(up to 20 TU)
Clear repair related faults
PARTS
Quantity Part Number Description
1.00 5NN857706B RAA Seat Belt (passenger)*
Criteria I.D. 03
LABOR
Labor Op Time Units Description
6911 56 99 250 Replace driver and passenger seat belt
0150 00 50
Time stated on
diagnostic protocol
(up to 20 TU)
Clear repair related faults
PARTS
Quantity Part Number Description
1.00 5NN857705 RAA Seat Belt (driver)*
1.00 5NN857706B RAA Seat Belt (passenger)
The repair information in this document is intended for use only by skilled technicians who have the proper tools, equipment and training to correctly and safely maintain your vehicle. These
procedures are not intended to be attempted by “do-it-yourselfers,” and you should not assume this document applies to your vehicle, or that your vehicle has the condition described. To
determine whether this information applies, contact an authorized Volkswagen dealer. 2021 Volkswagen Group of America, Inc. and Volkswagen Canada. All Rights Reserved.
April 2021 69BH Page 5 of 18
Customer Letter Example (USA)
<MONTH YEAR>
<CUSTOMER NAME>
<CUSTOMER ADDRESS>
<CUSTOMER CITY STATE ZIPCODE>
This notice applies to your vehicle: <MODEL YEAR> <BRAND> <CARLINE>, <VIN>
NHTSA: 20V724
Subject: Safety Recall 69BH – Front Seat Belts
Dear Volkswagen Owner,
This notice is sent to you in accordance with the National Traffic and Motor Vehicle Safety Act. Volkswagen has
decided that a defect, which relates to motor vehicle safety, exists in certain 2018 model year Volkswagen Tiguan
vehicles. Our records show that you are the owner of a vehicle affected by this action.
What is the issue? During two (2) NHTSA New Car Assessment Program (NCAP) tests, the seat belts on
the front driver side of the Tiguan ruptured. A ruptured seat belt may increase the risk
of injuries in the event of a vehicle crash.
What will we do? To correct this defect, your authorized Volkswagen dealer will replace one or both of the
front seat belts. This work will take up to four (4) hours to complete and will be performed
for you free of charge. Please keep in mind that your dealer may need additional time
for the preparation of the repair, as well as to accommodate their daily workshop
schedule.
What should you do? Please contact your authorized Volkswagen dealer without delay to schedule this recall
repair. To set up an appointment online, please visit www.vw.com/find-a-dealer.
Lease vehicles and
address changes
If you are the lessor and registered owner of the vehicle identified in this action, the law
requires you to forward this letter immediately via first-class mail to the lessee within ten
(10) days of receipt. If you have changed your address or sold the vehicle, please fill out
the enclosed prepaid Owner Reply card and mail it to us so we can update our records.
Can we assist you
further?
If your authorized Volkswagen dealer fails or is unable to complete this work free of
charge within a reasonable time, or if you should have any questions about this
communication, please reach out to us using your preferred method of communication
at www.vw.com/contact or by calling us at 800-893-5298.
Checking your vehicle
for open Recalls and
Service Campaigns
To check your vehicle’s eligibility for repair under this or any other recall/service
campaign, please visit www.vw.com/owners/recalls and enter your Vehicle Identification
Number (VIN) into the Recall/Service Campaign Lookup tool.
If you still cannot obtain satisfaction, you may file a complaint with: The Administrator, National Highway Traffic
Safety Administration, 1200 New Jersey Avenue, SE., Washington, DC 20590; or call the toll-free Vehicle Safety
Hotline at 1-888-327-4236 (TTY: 1-800-424-9153); or go to https://www.safercar.gov.
We apologize for any inconvenience this matter may cause; however we are taking this action to help ensure your
safety and continued satisfaction with your vehicle.
Sincerely,
Volkswagen Customer Protection
The repair information in this document is intended for use only by skilled technicians who have the proper tools, equipment and training to correctly and safely maintain your vehicle. These
procedures are not intended to be attempted by “do-it-yourselfers,” and you should not assume this document applies to your vehicle, or that your vehicle has the condition described. To
determine whether this information applies, contact an authorized Volkswagen dealer. 2021 Volkswagen Group of America, Inc. and Volkswagen Canada. All Rights Reserved.
April 2021 69BH Page 6 of 18
Customer
Customer Letter Example (Canada)
Example (USA)
<MONTH YEAR>
<CUSTOMER NAME>
<CUSTOMER ADDRESS>
<CUSTOMER CITY STATE ZIPCODE>
This notice applies to your vehicle: <MODEL YEAR> <BRAND> <CARLINE>, <VIN>
Transport Canada Recall: 2020-562
Subject: Safety Recall 69BH – Front Seat Belts
Dear Volkswagen Owner,
This notice is sent to you in accordance with the requirements of the Motor Vehicle Safety Act. This is to inform you
that your vehicle may contain a defect that could affect the safety of a person. Our records show that you are the
owner of a vehicle affected by this action.
What is the issue? During two (2) NHTSA New Car Assessment Program (NCAP) tests in the United
States, the seat belts on the front driver side of the Tiguan ruptured. A ruptured seat
belt may increase the risk of injuries in the event of a vehicle crash.
What will we do? To correct this defect, your authorized Volkswagen dealer will replace one or both of the
front seat belts. This work will take up to four (4) hours to complete and will be performed
for you free of charge. Please keep in mind that your dealer may need additional time
for the preparation of the repair, as well as to accommodate their daily workshop
schedule.
What should you do? Please contact your authorized Volkswagen dealer without delay to schedule this
recall repair.
Lease vehicles and
address changes
If you are the lessor and registered owner of the vehicle identified in this letter, you
shall forward this letter (and any subsequent notice, if applicable) to the lessee within
ten (10) days of receipt. If you have changed your address or sold the vehicle identified
in this letter, please fill out the enclosed prepaid Owner Reply Card and mail it to us
so we can update our records.
Can we assist you
further?
If your authorized Volkswagen dealer fails or is unable to complete this work free of
charge within a reasonable time, please contact Customer Relations, Monday through
Friday from 8AM to 8PM EST by phone at 1-800-822-8987 or via our “Contact Us”
page at www.vw.ca.
We apologize for any inconvenience this matter may cause; however we are taking this action to help ensure your
safety and continued satisfaction with your vehicle.
Sincerely,
Volkswagen Customer Protection
The repair information in this document is intended for use only by skilled technicians who have the proper tools, equipment and training to correctly and safely maintain your vehicle. These
procedures are not intended to be attempted by “do-it-yourselfers,” and you should not assume this document applies to your vehicle, or that your vehicle has the condition described. To
determine whether this information applies, contact an authorized Volkswagen dealer. 2021 Volkswagen Group of America, Inc. and Volkswagen Canada. All Rights Reserved.
April 2021 69BH Page 7 of 18
Repair Overview
Vehicles with Criteria 01 – replace left
(driver) seat belt.
Vehicles with Criteria 02 – replace right
(passenger) seat belt.
Vehicles with Criteria 03 – replaced left AND
right seat belts.
NOTE
These repair instructions may differ from the labor operations and labor times listed in ELSA.
Damages resulting from improper repair or failure to follow these work instructions are the dealer’s
responsibility and are not eligible for reimbursement under this action.
This procedure must be read in its entirety prior to performing the repair.
Due to variations in vehicle equipment and options, the steps/illustrations in this work procedure may not
identically match all affected vehicles.
Diagnosis and repair of pre-existing conditions in the vehicle are not covered under this action.
When working during extreme temperatures, it is recommended that the vehicle be allowed to acclimate
inside the shop to avoid temperature-related component damage/breakage.
The repair information in this document is intended for use only by skilled technicians who have the proper tools, equipment and training to correctly and safely maintain your vehicle. These
procedures are not intended to be attempted by “do-it-yourselfers,” and you should not assume this document applies to your vehicle, or that your vehicle has the condition described. To
determine whether this information applies, contact an authorized Volkswagen dealer. 2021 Volkswagen Group of America, Inc. and Volkswagen Canada. All Rights Reserved.
April 2021 69BH Page 8 of 18
Required Tools
Wedge Set
-T10383-
(or equivalent)
Omega Clip Tool
-T40280-
(or equivalent)
Airbag Lockout Adapter
-VAS6282-
Pry lever
-80-200-
(or equivalent)
The repair information in this document is intended for use only by skilled technicians who have the proper tools, equipment and training to correctly and safely maintain your vehicle. These
procedures are not intended to be attempted by “do-it-yourselfers,” and you should not assume this document applies to your vehicle, or that your vehicle has the condition described. To
determine whether this information applies, contact an authorized Volkswagen dealer. 2021 Volkswagen Group of America, Inc. and Volkswagen Canada. All Rights Reserved.
April 2021 69BH Page 9 of 18
Repair Instruction
Section A – Check for Previous Repair
TIP
If Campaign Completion label is present, no further work is required.
Enter the VIN in Elsa and proceed to the
“Campaign/Action” screen.
TIP
On the date of repair, print this screen and keep a
copy with the repair order.
Confirm the Campaign/Action is open <arrow
1>. If the status is closed, no further work is
required.
Note the Applicable Criteria ID <arrow 2> for
use in determining the correct work to be done
and corresponding parts associated.
CRITICAL REPAIR STEP
STOP!
If multiple software update Campaign/Actions are
open, they must be performed in order of the Start
date <arrow 3>. The oldest should be performed
first.
All Safety Recalls must be completed prior
to completing this campaign.
Proceed to Section B.
The repair information in this document is intended for use only by skilled technicians who have the proper tools, equipment and training to correctly and safely maintain your vehicle. These
procedures are not intended to be attempted by “do-it-yourselfers,” and you should not assume this document applies to your vehicle, or that your vehicle has the condition described. To
determine whether this information applies, contact an authorized Volkswagen dealer. 2021 Volkswagen Group of America, Inc. and Volkswagen Canada. All Rights Reserved.
April 2021 69BH Page 10 of 18
Section B – Replacing Front Seat Belt
WARNING
Risk of injury. Refer to “Warning and Safety Precautions”, found in Appendix A at the end of this document.
NOTE
The following describes the removal and installation procedures on the left side (driver) of the vehicle. Removing
and installing on the right side (passenger) is similar.
Remove front seat:
Position the seat as far forward as possible
using the forward/back adjustment.
Remove the bolts <3 and 4>.
Position the seat as far back as possible using
the forward/back adjustment.
Remove the bolts <1 and 2>.
Tilt the seat back.
Open the cover in the carpet.
Depending on the vehicle equipment level,
release and remove the wiring harnesses from
the seat at the connector station.
Connect the -VAS6282- to the thorax airbag
wiring harness on the seat.
Remove the seat from the vehicle.
The repair information in this document is intended for use only by skilled technicians who have the proper tools, equipment and training to correctly and safely maintain your vehicle. These
procedures are not intended to be attempted by “do-it-yourselfers,” and you should not assume this document applies to your vehicle, or that your vehicle has the condition described. To
determine whether this information applies, contact an authorized Volkswagen dealer. 2021 Volkswagen Group of America, Inc. and Volkswagen Canada. All Rights Reserved.
April 2021 69BH Page 11 of 18
Remove front sill panel:
Detach the rear sill panel from the body in the
transition area to the front sill panel.
Release the front sill panel strip retaining tabs
<1> from the lower B-pillar trim panel <2>
using the -T10383- <arrow A>.
Loosen the front sill panel <1> from the side
sill and door seal molding using the -T10383-
<B arrows>.
Open the belt guide cover and guide the seat
belt out.
Guide the sill panel out of the vehicle.
Remove upper B-pillar trim panel:
Move seat belt height adjuster to the lowest
position.
Starting at the bottom, disengage the B-pillar
upper trim panel <1> at the door seal
<arrow A> by placing the -T10383- on the front
edge of the trim panel.
Unclip the B-pillar upper trim panel <1> from
the B-pillar lower trim panel <4> <B arrows>
by placing the -T10383- on the lower edge of
the trim panel.
CAUTION
For the following procedure, make sure that the Bpillar
upper trim panel does not pivot too far inward,
which could cause damage to the headliner.
Remove the B-pillar upper trim panel <1> from
the mount on the body <arrow C> by pivoting
the trim panel slightly inward and pulling it
downward.
Guide the seat belt webbing with belt tongue
out through the slide for the seat belt height
adjuster, and then remove the upper B-pillar
trim panel.
The repair information in this document is intended for use only by skilled technicians who have the proper tools, equipment and training to correctly and safely maintain your vehicle. These
procedures are not intended to be attempted by “do-it-yourselfers,” and you should not assume this document applies to your vehicle, or that your vehicle has the condition described. To
determine whether this information applies, contact an authorized Volkswagen dealer. 2021 Volkswagen Group of America, Inc. and Volkswagen Canada. All Rights Reserved.
April 2021 69BH Page 12 of 18
Remove lower B-pillar trim panel:
Loosen the lower B-pillar trim panel <1> from
the door seal molding.
Loosen the lower B-pillar trim panel <1> near
the clips from the body mounts using the
Wedge Set -T10383-.
Disconnect the 12V battery with the ignition
switched ON:
WARNING
Accident risk. When working on pyrotechnic
components (such as airbags and belt tensioners),
the battery must be disconnected with the ignition
switched ON.
Turn ON the ignition.
Access the battery.
Loosen the nut <3>.
Remove and isolate the battery ground cable
<2> from the battery terminal.
The repair information in this document is intended for use only by skilled technicians who have the proper tools, equipment and training to correctly and safely maintain your vehicle. These
procedures are not intended to be attempted by “do-it-yourselfers,” and you should not assume this document applies to your vehicle, or that your vehicle has the condition described. To
determine whether this information applies, contact an authorized Volkswagen dealer. 2021 Volkswagen Group of America, Inc. and Volkswagen Canada. All Rights Reserved.
April 2021 69BH Page 13 of 18
Remove front seat belt guide:
Press the seat belt guide bracket <1> together
in the direction of <a arrows>.
At the same time, disengage the seat belt
guide <1> downward from the body in the
direction of <arrow b>.
Remove the seat belt guide <1> upward with
the bracket pushed together <arrow c>.
Thread the seat belt webbing out and remove
the seat belt guide <1>.
Remove seat belt:
Remove the bolt <2>.
Remove the seat belt relay <1> with the seat
belt webbing.
The repair information in this document is intended for use only by skilled technicians who have the proper tools, equipment and training to correctly and safely maintain your vehicle. These
procedures are not intended to be attempted by “do-it-yourselfers,” and you should not assume this document applies to your vehicle, or that your vehicle has the condition described. To
determine whether this information applies, contact an authorized Volkswagen dealer. 2021 Volkswagen Group of America, Inc. and Volkswagen Canada. All Rights Reserved.
April 2021 69BH Page 14 of 18
WARNING
Before handling pyrotechnic components (for
example, disconnecting the connector), the person
handling it must “discharge static electricity”. This
can be done by touching the door striker, for
example.
Disconnect the connector <6> by removing the
connector lock.
Remove the bolt <5> and nut <7>.
Remove the belt end fitting <4> from the side
sill.
Disconnect the connectors <2> by removing
the connector locks.
Remove the bolt <3> and then remove the
automatic belt retractor <1> from the mount.
Install new seat belt in the reverse order of
removal:
Torque the fasteners as follows:
3 = 40 Nm.
8 = 40 Nm.
9 = 40 Nm.
10 = 8 Nm.
Connect and lock connectors.
Install seat belt guide <5>.
The repair information in this document is intended for use only by skilled technicians who have the proper tools, equipment and training to correctly and safely maintain your vehicle. These
procedures are not intended to be attempted by “do-it-yourselfers,” and you should not assume this document applies to your vehicle, or that your vehicle has the condition described. To
determine whether this information applies, contact an authorized Volkswagen dealer. 2021 Volkswagen Group of America, Inc. and Volkswagen Canada. All Rights Reserved.
April 2021 69BH Page 15 of 18
Reinstall trim:
Installation of the B-pillar trim and sill trim is the
reverse order of removal.
Remove any trim clamps remaining in the
body using the -T40280-.
Reinstall front seat:
Installation is the reverse order of removal.
Torque seat bolts to 40 Nm.
Reconnect 12V battery:
WARNING
Ignition must be ON when connecting battery. If
pyrotechnic components (e.g. airbag, belt tensioner)
are not repaired correctly, they may deploy
unintentionally after connecting battery. There must
not be anyone inside the vehicle when connecting
the battery.
Disconnect the connector <2> from the Battery
Monitoring Control Module -J367- <3> (if
equipped).
Attach the battery ground cable clamp by hand
to the battery negative terminal and torque the
nut <1> to 6 Nm.
Reconnect the connector to the Battery
Monitoring Control Module -J367- (if
equipped).
Cycle the ignition off and back on.
Set clock to local time.
The repair information in this document is intended for use only by skilled technicians who have the proper tools, equipment and training to correctly and safely maintain your vehicle. These
procedures are not intended to be attempted by “do-it-yourselfers,” and you should not assume this document applies to your vehicle, or that your vehicle has the condition described. To
determine whether this information applies, contact an authorized Volkswagen dealer. 2021 Volkswagen Group of America, Inc. and Volkswagen Canada. All Rights Reserved.
April 2021 69BH Page 16 of 18
Activate the convenience open/close
functions.
Check the DTC memories of all the control
units and erase under-voltage faults if
necessary.
NOTE
After connecting the battery and switching
on the ignition, the ASR/ESP Control Lamp
-K155- and Electromechanical Power
Steering Indicator Lamp light up
continuously. The indicator lamps switch off
automatically after driving a short distance
(less than 100 meters). This activates
Steering Angle Sensor -G85-.
Once -G85- is activated and the ignition is
cycled, the Start/Stop function will also start
working again and any faults related to the
battery being disconnected should be able to
be cleared.
Proceed to Section C
The repair information in this document is intended for use only by skilled technicians who have the proper tools, equipment and training to correctly and safely maintain your vehicle. These
procedures are not intended to be attempted by “do-it-yourselfers,” and you should not assume this document applies to your vehicle, or that your vehicle has the condition described. To
determine whether this information applies, contact an authorized Volkswagen dealer. 2021 Volkswagen Group of America, Inc. and Volkswagen Canada. All Rights Reserved.
April 2021 69BH Page 17 of 18
Section C – Parts Return/Disposal
Properly store (retain), destroy or dispose of removed parts in accordance with all state/province and local
requirements, unless otherwise indicated and/or requested through the Warranty Parts Portal (WPP) for U.S. and
the Part Destruction and Core Disposition Report for Canada.
Proceed to Section D (U.S. dealers only)
Section D – MANDATORY Parts Return Information (U.S. dealers only)
IMPORTANT
DO NOT detonate the seat belt tensioner prior to return. Seat belts are to be returned intact and left in their asremoved
state.
A select number of seat belts replaced under Action 69BH must be returned to the designated inspection
facility. Requests for all seat belts will be available in the Warranty Parts Portal (WPP) once the claim
has reached Approved status in SAGA.
Seat belts not returned or improperly returned, if requested, are subject to claim cancellation.
Action – 69BH claims will be cancelled in SAGA in the event the seat belts requested for return through
the WPP are not received or are not in-transit with FedEx by the request expiration date.
Use the Warranty Parts Portal to obtain the FedEx shipping label and required hazardous material
documentation.
The repair information in this document is intended for use only by skilled technicians who have the proper tools, equipment and training to correctly and safely maintain your vehicle. These
procedures are not intended to be attempted by “do-it-yourselfers,” and you should not assume this document applies to your vehicle, or that your vehicle has the condition described. To
determine whether this information applies, contact an authorized Volkswagen dealer. 2021 Volkswagen Group of America, Inc. and Volkswagen Canada. All Rights Reserved.
April 2021 69BH Page 18 of 18
Appendix A – Warning and Safety Precautions
WARNING
General
Testing, assembly, and repair work may only be performed by qualified personnel.
There is no change interval for airbag units.
Never test with a test light, volt meter or ohm meter.
The pyrotechnic components may be checked only when they are installed and with a vehicle diagnostic tester
approved by the manufacturer.
When working on pyrotechnic components and on the Airbag Control Module -J234-, the battery ground cable
must be disconnected when the ignition is switched on. Then cover the negative terminal.
Wait for 10 seconds after disconnecting the battery.
The ignition must be SWITCHED ON when connecting the battery. Nobody should be inside the vehicle when
doing this.
If the ignition is not switched on after the battery is reconnected – “indicator lamps in the instrument cluster do not
light up” – the ignition (key/button) may only be switched on when the driver seat is positioned all the way back.
Follow the steps after connecting the battery. Refer to → Electrical Equipment; Rep. Gr.27.
The technician must discharge static electricity before handling pyrotechnic components for the restraint system,
for example, before disconnecting the connector. Touching grounded metal parts will discharge the static
electricity, for example by touching the door striker.
Wash hands after touching ignited restraint system pyrotechnic components.
Pyrotechnic components may not be opened nor repaired; always use new parts (risk of injury).
Pyrotechnic components that have fallen onto a hard surface or show signs of damage must not be installed in
the vehicle.
Pyrotechnic components should be installed immediately upon removal from shipping package.
If the procedure must be stopped for awhile, put the pyrotechnic component back into its shipping package.
It is not permitted to leave a pyrotechnic component out unattended.
When connecting the restraint system pyrotechnic components, only the person performing the work should be
in the vehicle.
Do not use any grease, cleaning solutions or similar substance on pyrotechnic components.
Replace the airbag unit if any contaminants such as oil, grease, paint, dye or solvents have penetrated the fabric.
Pyrotechnic components must not be exposed to temperatures over 100 °C, even for a short time.
WARNING
Special Information Regarding Belt Tensioners
Use extreme care when removing and installing belt tensioner units. Improper handling of belt tensioner units is
very dangerous and could result in serious personal injury.
Belt tensioner units that are mechanically damaged (dents, cracks) must always be replaced.
The open end of the belt tensioner should never be pointed at anyone.
When connecting a belt tensioner, all mechanical parts, including those in the three-point seat belt, must be
secured correctly. If it is not possible to connect the belt tensioner because of insufficient space, the seat belt
webbing must be rolled up completely prior to connection. In this case there is no increased safety risk, if all other
safety instructions are followed. This particularly includes the notes regarding the disconnection of the battery and
the static discharging of the technician prior to connecting the belt tensioner.
Even after a crash, it is possible that the belt tensioner ignited, but the seat belt force limiter did NOT. Treat these
components as if they had not ignited.
************************************************************************************************************
VOLKSWAGEN DEALER COMMUNICATION
Ensure all dealership personnel are aware of this notice so they are able to address customer questions. Contact Warranty if you require
additional assistance. Direct press inquiries to Volkswagen Public Relations.
Volkswagen Customer Protection 69BH_DLR_ADV
Advance Notice – Safety Recall 69BH / Front Seat Belts
This notice is for: Dealer Principal
General Manager
Sales Managers
Service Manager
Parts Manager
Service Consultant
Warranty Administrator
Technicians
Date: November 30, 2020
Issue: During two (2) NHTSA New Car Assessment Program (NCAP) tests, the seat belts on
the front driver side of the Tiguan ruptured. A ruptured seat belt may increase the risk of
injuries in the event of a vehicle crash.
Repair: REPAIR NOT YET AVAILABLE
Check daily campaign open inventory report or OMD for affected vehicles in
inventory
Affected Vehicles Country Beginning
Model Year
Ending
Model Year Vehicle Vehicle
Count
USA 2018 2018 TIGUAN 10,835
CAN 2018 2018 TIGUAN 1,678
*Counts reflect overall population; some vehicles may have already been repaired. Check Campaigns/Actions
screen in Elsa on the day of repair to verify that a VIN qualifies for repair under this action. Elsa is the only valid
campaign inquiry & verification source.
Notes: IMPORTANT REMINDER: VEHICLES AFFECTED BY SAFETY & COMPLIANCE RECALLS
New Vehicles in Dealer Inventory: It is a violation of federal law for a dealer to deliver a new
motor vehicle or any new or used item of motor vehicle equipment (including a tire) covered by
this notification under a sale or lease until the defect or noncompliance is remedied. By law,
dealers must correct, prior to delivery for sale or lease, any vehicle that fails to comply with an
applicable Federal Motor Vehicle Safety Standard or that contains a defect relating to motor
vehicle safety.
Pre-Owned Vehicles in Dealer Inventory: Dealers should not deliver any pre-owned vehicles in
their inventory which are involved in a safety or compliance recall until the defect has been
remedied.
-END OF MESSAGE
************************************************************************************************************
VOLKSWAGEN DEALER COMMUNICATION
Ensure all dealership personnel are aware of this notice so they are able to address customer questions. Contact Warranty if you require
additional assistance. Direct press inquiries to Volkswagen Public Relations.
Volkswagen Customer Protection 69BH_DLR_LAUNCH
Repair Available – Safety Recall 69BH / Front Seat Belts
This notice is for: Dealer Principal
General Manager
Sales Managers
Service Manager
Parts Manager
Service Consultant
Warranty Administrator
Technicians
Date: April 12, 2021
Issue: During two (2) NHTSA New Car Assessment Program (NCAP) tests, the seat belts on
the front driver side of the Tiguan ruptured. A ruptured seat belt may increase the risk of
injuries in the event of a vehicle crash.
Repair: REPAIR AVAILABLE – April 13, 2021 / Replace one or both front seat belts.
See ELSA/ServiceNet for complete repair & claiming instructions
Check both the daily Campaign Open Inventory report and OMD for affected
vehicles in inventory. Verify OPEN status in ELSA on the day of repair.
Repair every affected inventory vehicle before delivery to consumers.
Parts Department: There will be no parts allocation. Please coordinate with your service department to
ensure that parts are available for all scheduled appointments.
Affected Vehicles Country Beginning
Model Year
Ending
Model Year Vehicle Vehicle
Count
USA 2018 2018 TIGUAN 10,835
CAN 2018 2018 TIGUAN 1,678
*Counts reflect overall population; some vehicles may have already been repaired. Check Campaigns/Actions
screen in Elsa on the day of repair to verify that a VIN qualifies for repair under this action. Elsa is the only valid
campaign inquiry & verification source.
Notes: Schedule owner repairs immediately
Owner mailing – April 2021
U.S.A.: Loaner/rental coverage cannot be claimed under this action. However,
loaner/rental may be covered under the Alternate Transportation Program. Please refer
to the Volkswagen Warranty Policy and Procedures Manual for loaner claims information
and reimbursement details.
Canada: Loaner/rental coverage cannot be claimed under this action. Please refer to the
Volkswagen Service Loaner Program to determine loaner eligibility.
IMPORTANT REMINDER: VEHICLES AFFECTED BY SAFETY & COMPLIANCE RECALLS
New Vehicles in Dealer Inventory: It is a violation of federal law for a dealer to deliver a new
motor vehicle or any new or used item of motor vehicle equipment (including a tire) covered by
this notification under a sale or lease until the defect or noncompliance is remedied. By law,
dealers must correct, prior to delivery for sale or lease, any vehicle that fails to comply with an
applicable Federal Motor Vehicle Safety Standard or that contains a defect relating to motor
vehicle safety.
Pre-Owned Vehicles in Dealer Inventory: Dealers should not deliver any pre-owned vehicles in
their inventory which are involved in a safety or compliance recall until the defect has been
remedied.
-END OF MESSAGE
SEOCONTENT-END
1 Affected Product
Vehicle
| MAKE | MODEL | YEAR |
| VOLKSWAGEN | TIGUAN | 2018 |
15 Associated Documents
Chronology for Volkswagen Recall 69BH Front Seat Belts
RMISC-20V724-4814.pdf 214.531KB
Defect Notice 573 Report
RCLRPT-20V724-2058.PDF 215.125KB
Recall 573 Report-Amendment 1
RCLRPT-20V724-4744.PDF 215.165KB
Recall Acknowledgement
RCAK-20V724-1668.pdf 244.161KB
Manufacturer Notices(to Dealers,etc) – Date: November 30, 2020 Advance Notice – Safety Recall 69BH / Front Seat Belts
RCMN-20V724-5710.pdf 685.559KB
Recall Quarterly Report #1, 2021-2
RCLQRT-20V724-2519.PDF 211.153KB
ISSUED Owner Notification Letter(Part 577) – 69BH VW Customer
RCONL-20V724-5727.pdf 96.129KB
Remedy Instructions and TSB
RCRIT-20V724-2671.pdf 1814.658KB
ISSUED Owner Notification Letter(Part 577) – 69BH VW Customer PRI
RCONL-20V724-7232.pdf 108.581KB
Manufacturer Notices(to Dealers,etc) – Date: April 12, 2021 Repair Available – Safety Recall 69BH / Front Seat Belts
RCMN-20V724-0429.pdf 195.201KB
ISSUED Interim Owner Notification Letter(Part 577 – 69BH__ INTERIM_ VW Customer Letter PRI
RIONL-20V724-4408.pdf 129.238KB
ISSUED Interim Owner Notification Letter(Part 577) – 69BH__ INTERIM_ VW Customer Letter
RIONL-20V724-5364.pdf 113.497KB
69BH Recall FAQ
RMISC-20V724-6397.pdf 457.846KB
Recall Quarterly Report #2, 2021-3
RCLQRT-20V724-6817.PDF 211.26KB
69BH Recall FAQ_12012021
RMISC-20V724-4713.pdf 383.499KB
Latest Recalls Documents
1 Associated Investigation
Seat Belt Webbing Failure
NHTSA ID: EA18005
Dated opened: July 3, 2018
In December 2017, NHTSA conducted two New Car Assessment Program (NCAP) tests on the 2018 MY Volkswagen (VW) Tiguan. Both tests were 35 mph, full frontal impacts into a rigid barrier with a 50th percentile male dummy seat-belted in the driver position and a 5th percentile female seat-belted in the right front-passenger position. The tests were conducted on December 8, 2017 at MGA Research Corp. in Wisconsin (MGA) and December 13, 2017 at the Transportation Research Center of Ohio (TRC).
During both crash tests, the driver seat belt webbing completely separated in tension where it looped through the seat belt latch tongue (see attached photos). Based on its analysis of the NCAP test results, VW asserted that the test dummy umbilical cord exerted additional forces on the seat belt system causing the separation. To support this theory, VW conducted several sled tests.
The Office of Defects Investigation (ODI) opened a Preliminary Evaluation (PE18-001) on 01/10/2018 to evaluate the two (2) incidents of seat belt separation. ODI and NCAP reviewed the sled test data submitted by VW in support of their theory. Micro analysis, conducted by the Materials Laboratory at the National Transportation Safety Board (NTSB), verified the seat belts failed in tension and not due to cuts or abrasion.
ODI is upgrading PE18-001 to an Engineering Analysis to further examine seat belt behavior in the subject vehicles and to determine, among other things, a root cause for the seat belt separation . ODI will perform a thorough review of any vehicle and seat belt design changes for the new 2018 MY Tiguan platform and their effects on the performance of the seat belt system.
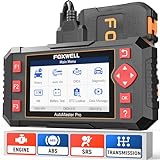
- [Easy to Use—Work Out of the Box] + [FOXWELL 2026 New Version] FOXWELL NT604 Elite scan tool is the 2026 new version from FOXWELL, designed for car owners who want to figure out the cause of issues before fixing car problems by scanning common systems like ABS, SRS, engine, and transmission. The NT604 Elite obd2 scanner diagnostic tool comes with the latest software—no need to waste time downloading software first. Plug the scanner into the OBDII port with OBDII cable to start the diagnosis.
- [Affordable] + [Reliable Car Health Monitor] Will you be confused what happens when the warning light of ABS/SRS/transmission/check engine flashes? Instead of taking your cars to dealership, this FOXWELL scanner will help you do a thorough scanning and detection for your cars and pinpoint the root cause. Note:The device is a diagnostic tool, not a repair tool. To turn off a warning light, you must first physically repair the issue causing it. Only then can the scanner be used to clear the corresponding fault code.
- [5 in 1 Car Diagnostic Scanner] Compared with obd scanners (50-100), NT604 Elite code scanner not only includes their OBDII diagnosis but also serves as ABS/SRS scanner, transmission and check engine code reader. When it’s an odb2 scanner, you can use it to check if your car is ready for annual test through I/M readiness menu. In addition, live data stream, built-in DTC library, data play back and print, all these features are a big plus for it. Note: doesn't support maintenance functions like reset or relearn. For the SRS system, NT604 Elite can read and clear common fault codes not caused by a crash, but crash/collision data cannot be cleared.
- [Fantastic AUTOVIN] + [No extra software fee] Through the AUTOVIN menu, this NT604 Elite car scanner allows you to get your V-IN and vehicle info rapidly, no need to take time to find your V-IN and input one by one. What's more, the NT604 Elite ABS SRS scanner supports 60+ car brands from worldwide (America/Asia/Europe). You don’t need to pay extra software fee. AUTOVIN may not work on some older vehicles or certain vehicle brands. If AUTOVIN fails, please input the vin code manually or go to the Diagnostic Menu to select your vehicle model.
- [Solid protective case KO plastic carrying bag] + [Lifetime update] Almost all same price-level car scanner diagnostic tool only offers plastic bag to hold the scanner.However, NT604 Elite automotive scanner is equipped with solid protective case, preventing your obd2 scanner from damage. Then you don’t need to pay extra money to buy a solid toolbox.


- 【Reset ABS/SRS/Transmission/Engine Lights】 More than an check engine code reader, OBDMATE OM901 obd2 scanner performs comprehensive diagnostics for the 4 most-used systems (ABS/SRS/Engine/Transmission). It quickly clears fault codes, turns off warning lights, read data stream and auto VIN.
- 【3.5" Handheld Scanner with 4 System Diagnose】 3.5" Super large TFT screen equipped displays an intuitive menu and clear readings of various sensors from ABS, SRS, ECM and TCM systems. It arrived with a silicone protective case and hard-shell carrying case, ensuring long-lived durability and drop resistance. The car diagnostic tool is plug-to-play designed, plug it and get diagnosis started without any batteries or updates required.
- 【One-Click I/M Readines&Full OBD2 Functions】 Press F1 to get an intuitive corloured form about whether various emissions-related systems on the vehicle are operating properly. Help you get smog-check ready quickly. OM901 car scanner supports all essential OBD2 functions you need: read & clear codes, view freeze frame, read I/M readiness, retrieve VIN, live data stream (with graphing display), O2 sensor test, onboard monitoring mode, and EVAP leak test.
- 【Battery Voltage Check&DLC Pin Test】 It allows you to monitor battery health by testing current battery voltage. Plus, this obd2 diagnostic tool features DLC 16-PIN test to check current voltage of every pin.
- 【Automotive Scanner Diagnostic Kit】 The package comes with 1 car scanner, 1 USB-type c cable, 1 hard storage bag and 1 user manual(en). Free to update without any hidden fees. 5 languanges available in setting including English, French, Italian, German and Espanish. Valuable and Portable, making it a great tool kit for car owners, DIY enthusiasts, and professional mechanics.
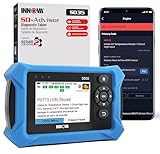
- OBD2 SCANNER FOR ALL SYSTEMS – The INNOVA SD35 is a tablet-based OBD2 scanner designed for advanced diagnostics. Read and clear check engine light, ABS, SRS, and TPMS codes, plus test your car battery and alternator to prevent unexpected failures. Vehicle coverage may vary. Please use Innova’s Coverage Checker to verify compatibility.
- ALL-SYSTEM DIAGNOSTICS & LIVE DATA – Unlike basic code readers, this OBD2 scanner for all vehicles scans engine, transmission, ABS, SRS, and more. Get real-time live data, including RPM, fuel trims, temperature readings, and oxygen sensor performance.
- OBD2 TABLET WITH USER-FRIENDLY INTERFACE – This automotive scan tool features a high-resolution display, making vehicle diagnostics faster and easier.
- ADVANCED TPMS, OIL RESET & SERVICE FUNCTIONS – Perform TPMS sensor checks, oil light reset, and other service resets with ease This professional diagnostic tool provides comprehensive vehicle maintenance capabilities in one device.
- WIDE VEHICLE COVERAGE (1996 & NEWER CARS & TRUCKS) – This OBD2 scanner Bluetooth tablet is compatible with Toyota, Ford, Honda, Chevrolet, Nissan, Dodge, and more. However, feature coverage may vary. Please use Innova's Coverage Checker to verify coverage.
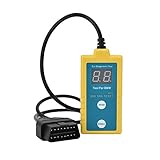
- ✔️【Professional SRS Reset for 1994-2003 BMW】 Designed specifically for classic BMW models (1994-2003). This B800 scanner reads & clears SRS airbag fault codes, turns off the warning light, and saves you a costly dealer visit. Confirmed compatible with: E36, E46 (EXCEPT 2001 330i), E34, E38, E39, Z3, and X5 (E53). NOT compatible with any BMW built before 1994 or after 2003.
- ✔️【Important: Two Different Connection Ports – Read Before Use】 To avoid “not working” issues, please note: For 1994–2000 BMWs (most E36, E34, Z3, early E39), the SRS diagnostic port is a round 20-pin connector under the hood. You MUST use the included 16-pin to 20-pin adapter cable. For 2000–2003 models (late E46, E39, X5), use the standard OBD-II port inside the cabin. Incorrect connection is the #1 reason for “incompatibility” reports.
- ✔️【Read & Clear Fault Codes in Minutes】 Quickly diagnose why your SRS light is on. The scanner accurately reads fault codes from airbag and seatbelt pretensioner systems. With one button press, clear the codes and reset the SRS warning light in seconds. No expensive dealer tools needed.
- ✔️【User-Friendly for DIYers – No Mechanic Required】 Easy operation with an intuitive button layout: ‘Enter’ to confirm, ‘Scroll’ to navigate. The clear LCD screen shows results instantly. Includes a step-by-step manual (revised for clarity) to guide you through the entire reset process.
- ✔️【Reliable Support with 1-Year Warranty】 We stand behind the quality of our B800 scanner. It comes with a 1-Year Hassle-Free Warranty. If you have any questions or need support, please contact us with your Order ID, and our dedicated team will assist you promptly.
- Comprehensive OBD2 Scanner with 16 Resets: The XTOOL D5S car code reader and vehicle reset tool provides an advanced diagnostic solution with 16 commonly needed reset functions, including Electronic Parking Brake Reset (EPB Reset), SAS, BMS Reset (Battery Test), Throttle Body Relearn, TPMS Reset, ABS Bleeding, Injector Coding, Gearbox Match, Suspension Adjustment, Headlight, Window Initialization, Crank Sensor Relearn and more. Equipped with CAN FD Protocol and FAC AutoAuth, the D5S obd2 scanner diagnostic tool ensures compatibility with a broad range of modern vehicles, allowing users to address common maintenance needs quickly. NOTE: Please Check the Compatibility before ordering.
- 4 Main System Car Scanner & Full OBD2 Diagnostics: The XTOOL D5S car code reader is ideal for home mechanics, DIYers, and professionals, providing access to Transmission/Engine/ABS/SRS systems to read DTCs, Live data can be displayed in text or up to 4 PID data graphs, along with full OBD2 diagnostics to check the engine light on, other obd2 issues and routine maintenance. This car diagnostic scanner ensures you can keep your vehicles in top condition, avoiding costly repairs or unexpected breakdowns. NOTE: Some vehicles display three systems after connection because the transmission and engine of some vehicles are integrated into one.
- Check Engine Code Reader & Real-Time Engine Monitoring: Whether you're a car owner, a DIYer, or run a repair shop, the XTOOL D5S obd2 scanner diagnostic tool makes engine diagnostics fast and frustration-free, reading and explaining trouble codes in seconds—no confusion. Check live data like fuel trim, 02 sensor voltage, RPM, and coolant temp to pinpoint mis~fires, rough idle, or sensor issues. After repairs, simply use the D5S check engine code reader and reset tool to turn off the check engine light and confirm the problem’s fixed—saving time, money, and unnecessary shop visits. - Note: If the check engine light comes back on, it indicates the original problem still exists.
- Portable Car Scanner for ABS and SRS: XTOOL D5S gives you peace of mind when ABS or airbag warning lights come on. It reads and clears ABS codes to help you fix brake sensor, traction control, or wheel speed issues, and supports ABS bleeding after repairs like caliper or master cylinder replacement. For airbag systems, it scans and clears SRS codes related to airbags, seatbelt tensioners, and crash sensors. Whether you're doing repairs at home or running a small shop, the D5S is a cost-effective solution for safety diagnostics. Note: If a fault code returns after clearing, it usually means the issue hasn’t been fully resolved. Please check the compatibility before ordering.
- Transmission Warning Light ON? Here’s the Transmission Diagnostic and Reset Tool You Need: The XTOOL D5S is more than just a basic car scanner—it’s an easy-to-use transmission diagnostic tool. From rough shifts to slipping gears, the D5S lets you read and clear transmission trouble codes, monitor real-time TCM data, and perform transmission resets after fluid changes or repairs. Whether you’re a hands-on car owner or a pro running a busy shop, this OBD2 scanner with transmission functions helps you catch problems early—saving you time, money, and future headaches.. Note: Clearing fault codes is equivalent to a reset on some vehicles, but not all. For help, contact XTOOL Tech Support.
This product presentation was made with AAWP plugin.