
March 22, 2023 NHTSA CAMPAIGN NUMBER: 23V189000
In the event of a crash, a torn air bag cannot protect occupants as intended, increasing the risk of injury.
NHTSA Campaign Number: 23V189
Manufacturer Volkswagen Group of America, Inc.
Components AIR BAGS
Potential Number of Units Affected 5,224
Summary
Volkswagen Group of America, Inc. (Audi) is recalling certain 2022-2023 Q4 E-Tron SUV and Q4 E-Tron Sportback vehicles. During deployment, the head curtain air bag could deform the door seal and expose the metal inlay within the seal, which could tear the air bag. As such, these vehicles fail to comply with the requirements of Federal Motor Vehicle Safety Standard number 226, “Ejection Mitigation.”
Remedy
Dealers will install cloth tape in the driver and front passenger B-pillar area, free of charge. Owner notification letters were mailed May 11, 2023. Owners may contact Audi’s customer service at 1-800-253-2834. Audi’s number for this recall is 69FA.
Notes
Owners may also contact the National Highway Traffic Safety Administration Vehicle Safety Hotline at 1-888-327-4236 (TTY 1-800-424-9153), or go to www.nhtsa.gov.
Check if your Audi has a Recall
Affected Vehicles
| Country | Beginning Model Year | Ending Model Year | Vehicle | Vehicle Count |
| USA | 2022 | 2023 | Q4 E-TRON SPORTBACK | 900 |
| USA | 2022 | 2023 | Q4 E-TRON SUV | 4,324 |
| CAN | 2022 | 2023 | Q4 E-TRON SPORTBACK | 139 |
| CAN | 2022 | 2023 | Q4 E-TRON SUV | 964 |
Problem Description
In a crash with head curtain airbag deployment, the airbag could deform the door seal and expose the metal inlay within the seal. If the exposed metal tears the airbag, the airbag would not be able to protect occupants as designed, increasing the risk of injury. Because of this, the vehicles included in this recall may not fully comply with the requirements of an airbag test according to FMVSS/CMVSS No. 226, “Ejection Mitigation”.
Corrective Action
Install cloth tape in driver and front passenger B-pillar area to secure the door seal in place.
Code Visibility
On April 03, 2023, the campaign code was applied to affected vehicles.
Owner Notification
Owner notification will take place in May 2023. Owner letter examples are included in this bulletin for your reference.
Repair Overview
Lower headliner and apply adhesive tape to both front door seals and body.
Chronology :
November 15, 2022: After performing a head-airbag test, as part of the conformity of production monitoring, it was discovered that the airbag material was locally damaged. The sample size was immediately increased and an analysis started.
December 2022 – February 2023: A second test also led to a local damage of the airbag material. All vehicles still in the production line were blocked and the analyses of the root cause was continued. A countermeasure that fastens the door seal in the B-pillar area was introduced in production. The topic was submitted to the Audi Product Safety Committee. The affected scope of vehicles in the field was verified.
March 15, 2023: The Audi Product Safety Committee decides a noncompliance recall.
Audi is not aware of any warranty claims, customer complaints or other field reports due to this issue.
2 Affected Products
Vehicle
| MAKE | MODEL | YEAR |
| AUDI | Q4 E-TRON | 2022-2023 |
8 Associated Documents
Noncompliance Notice 573 Report
RCLRPT-23V189-1965.PDF 215.75KB
Recall Acknowledgement
RCAK-23V189-8844.pdf 645.771KB
Volkswagen – Audi Dealer Advance Notice – April 2023
RCMN-23V189-2901.pdf 238.846KB
Remedy Instructions and TSB
RCRIT-23V189-9672.pdf 2622.435KB
Volkswagen – 69FA Audi Dealer Launch Notice – May 2023
RCMN-23V189-8975.pdf 320.629KB
ISSUED Owner Notification Letter(Part 577)
RCONL-23V189-2130.pdf 154.989KB
ISSUED Owner Notification Letter(Part 577)
RCONL-23V189-9357.pdf 169.82KB
Recall Quarterly Report #3, 2023-4
RCLQRT-23V189-7828.PDF 211.465KB
Latest Recalls Documents
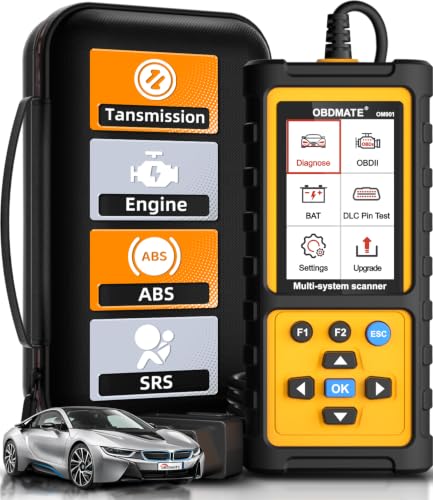
- 【Reset ABS/SRS/Transmission/Engine Lights】 More than an check engine code reader, OBDMATE OM901 obd2 scanner performs comprehensive diagnostics for the 4 most-used systems (ABS/SRS/Engine/Transmission). It quickly clears fault codes, turns off warning lights, read data stream and auto VIN.
- 【3.5" Handheld Scanner with 4 System Diagnose】 3.5" Super large TFT screen equipped displays an intuitive menu and clear readings of various sensors from ABS, SRS, ECM and TCM systems. It arrived with a silicone protective case and hard-shell carrying case, ensuring long-lived durability and drop resistance. The car diagnostic tool is plug-to-play designed, plug it and get diagnosis started without any batteries or updates required.
- 【One-Click I/M Readines&Full OBD2 Functions】 Press F1 to get an intuitive corloured form about whether various emissions-related systems on the vehicle are operating properly. Help you get smog-check ready quickly. OM901 car scanner supports all essential OBD2 functions you need: read & clear codes, view freeze frame, read I/M readiness, retrieve VIN, live data stream (with graphing display), O2 sensor test, onboard monitoring mode, and EVAP leak test.
- 【Battery Voltage Check&DLC Pin Test】 It allows you to monitor battery health by testing current battery voltage. Plus, this obd2 diagnostic tool features DLC 16-PIN test to check current voltage of every pin.
- 【Automotive Scanner Diagnostic Kit】 The package comes with 1 car scanner, 1 USB-type c cable, 1 hard storage bag and 1 user manual(en). Free to update without any hidden fees. 5 languanges available in setting including English, French, Italian, German and Espanish. Valuable and Portable, making it a great tool kit for car owners, DIY enthusiasts, and professional mechanics.
- [Easy to Use—Work Out of the Box] + [FOXWELL 2026 New Version] FOXWELL NT604 Elite scan tool is the 2026 new version from FOXWELL, designed for car owners who want to figure out the cause of issues before fixing car problems by scanning common systems like ABS, SRS, engine, and transmission. The NT604 Elite obd2 scanner diagnostic tool comes with the latest software—no need to waste time downloading software first. Plug the scanner into the OBDII port with OBDII cable to start the diagnosis.
- [Affordable] + [Reliable Car Health Monitor] Will you be confused what happens when the warning light of ABS/SRS/transmission/check engine flashes? Instead of taking your cars to dealership, this FOXWELL scanner will help you do a thorough scanning and detection for your cars and pinpoint the root cause. Note:The device is a diagnostic tool, not a repair tool. To turn off a warning light, you must first physically repair the issue causing it. Only then can the scanner be used to clear the corresponding fault code.
- [5 in 1 Car Diagnostic Scanner] Compared with obd scanners (50-100), NT604 Elite code scanner not only includes their OBDII diagnosis but also serves as ABS/SRS scanner, transmission and check engine code reader. When it’s an odb2 scanner, you can use it to check if your car is ready for annual test through I/M readiness menu. In addition, live data stream, built-in DTC library, data play back and print, all these features are a big plus for it. Note: doesn't support maintenance functions like reset or relearn. For the SRS system, NT604 Elite can read and clear common fault codes not caused by a crash, but crash/collision data cannot be cleared.
- [Fantastic AUTOVIN] + [No extra software fee] Through the AUTOVIN menu, this NT604 Elite car scanner allows you to get your V-IN and vehicle info rapidly, no need to take time to find your V-IN and input one by one. What's more, the NT604 Elite ABS SRS scanner supports 60+ car brands from worldwide (America/Asia/Europe). You don’t need to pay extra software fee. AUTOVIN may not work on some older vehicles or certain vehicle brands. If AUTOVIN fails, please input the vin code manually or go to the Diagnostic Menu to select your vehicle model.
- [Solid protective case KO plastic carrying bag] + [Lifetime update] Almost all same price-level car scanner diagnostic tool only offers plastic bag to hold the scanner.However, NT604 Elite automotive scanner is equipped with solid protective case, preventing your obd2 scanner from damage. Then you don’t need to pay extra money to buy a solid toolbox.
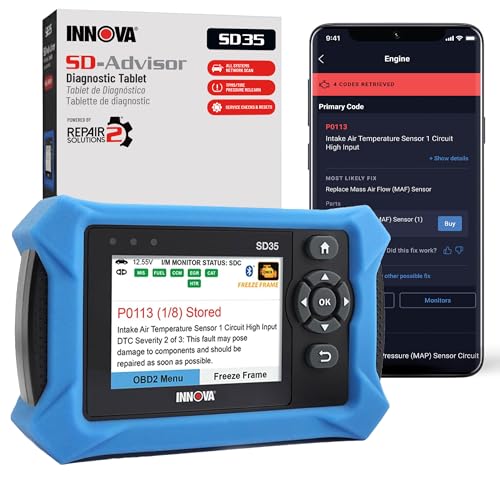
- OBD2 SCANNER FOR ALL SYSTEMS – The INNOVA SD35 is a tablet-based OBD2 scanner designed for advanced diagnostics. Read and clear check engine light, ABS, SRS, and TPMS codes, plus test your car battery and alternator to prevent unexpected failures. Vehicle coverage may vary. Please use Innova’s Coverage Checker to verify compatibility.
- ALL-SYSTEM DIAGNOSTICS & LIVE DATA – Unlike basic code readers, this OBD2 scanner for all vehicles scans engine, transmission, ABS, SRS, and more. Get real-time live data, including RPM, fuel trims, temperature readings, and oxygen sensor performance.
- OBD2 TABLET WITH USER-FRIENDLY INTERFACE – This automotive scan tool features a high-resolution display, making vehicle diagnostics faster and easier.
- ADVANCED TPMS, OIL RESET & SERVICE FUNCTIONS – Perform TPMS sensor checks, oil light reset, and other service resets with ease This professional diagnostic tool provides comprehensive vehicle maintenance capabilities in one device.
- WIDE VEHICLE COVERAGE (1996 & NEWER CARS & TRUCKS) – This OBD2 scanner Bluetooth tablet is compatible with Toyota, Ford, Honda, Chevrolet, Nissan, Dodge, and more. However, feature coverage may vary. Please use Innova's Coverage Checker to verify coverage.

- [All System Diagnostics, Professional-Level Scanner] - BLCKTEC 460T is the ultimate OBD2 diagnostic tool for home mechanics and professionals. It supports all 10 OBD2 modes, reads and clears Engine/Transmission/ABS/SRS codes, performs All-System Diagnostics, offers workshop reset tools, and provides real-time live data. It helps you pinpoint issues, assess your car's condition, and prepare for SMOG checks with ease. NOTE: Function availability depends on your vehicle. Before you buy, be sure to use the Compatibility Checker on BLCKTEC website or contact our customer support to verify that the features you need are supported for your vehicle’s specific year, make, and model.
- [12+ Most Popular Reset Functions] - BLCKTEC 460T OBD2 scanner offers 12+ dealer-level service functions, including Oil Maintenance Reset, ABS Bleeding, EPB Reset, SAS(Steering Angle Sensor) Recalibration, DPF(Diesel Particulate Filter) Reset, Throttle Body Relearn, Battery Reset/Initialization, TPMS Relearn, Transmission Reset, Fluid Change Reset, Maintenance Reset and more, enabling you to perform workshop services like a pro. NOTE: Function availability depends on your vehicle. Be sure to use the Compatibility Checker on BLCKTEC website to verify that the features you need are supported for your vehicle.
- [Real-Time OBD2 and OEM Live Data, Freeze Frame Data] - BLCKTEC 460T helps diagnose vehicle issues when warning lights like Check Engine Light or ABS/SRS Light appear. It offers detailed DTC info, ECU Freeze Frame Data, and real-time OBD2 and advanced OEM live data, including Engine, Transmission, ABS, SRS, and more, making it easy to diagnose and resolve vehicle problems. You can view, graph, record, replay, and overlay up to four live data streams in a single graph for better analysis.
- [AutoVIN, AutoReLink, AutoScan, 3X Faster] - Equipped with AutoVIN technology, 460T automatically retrieves the VIN to save you time. Its AutoScan and AutoReLink features scan all of the vehicle's ECUs and detect any fault codes immediately after you plug the scanner into the vehicle's OBD2 port - no button presses required. Additionally, it regathers DTC and I/M readiness information every 30 seconds, simplifying monitor tests. 460T's advanced technology makes it 3X faster than other products.
- [Get RepairSolutions2, the #1 Auto Repair App for Free] - When paired with RepairSolutions2(RS2) App, 460T becomes even more powerful. RS2's Verified Fix Database built by master technicians, provides the parts needed for the repair. Additionally, RS2 gives you access to OEM warranty info, maintenance schedules, TSB, and dealership recall info, making car care easier than ever. RS2 is free with no subscription fees and it stores your car scan reports in the cloud, allowing you to access, share, or print them anytime and anywhere.
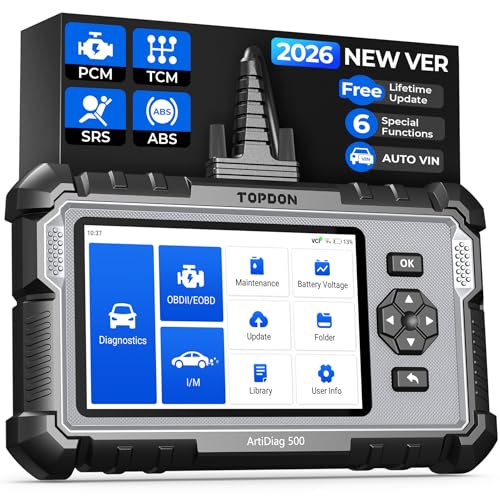
- [Brand-New ArtiDiag500] We've got everything you're looking for! Forget basic OBD2 scanners; TOPDON's ArtiDiag500 car scanner offers more. The all-new ArtiDiag500 not only includes full OBD2 functions and 4-system diagnostics but also provides DIYers with 6 maintenance services. The brand-new, cost effective AD500 is back in full swing!
- [4-System Diagnostics] DIY enthusiasts, take notice! Will these 4-system diagnostics be the treasure you've been seeking? The ArtiDiag500 code reader offers in-depth testing for the engine, transmission, ABS, and SRS systems, reading fault codes and data streams. It also visualizes real-time data in chart form, simplifying complex data for storage and future playback, aiding DIY users in problem detection.
- [6 Reset Functions] Hey, hang tight for a moment. With these 6 reset functions, the ArtiDiag500 has got you covered. It offers throttle adaptation along with reset capabilities for Oil, SAS, TPMS, BMS, and EPB. Seamlessly aligning the throttle, battery, tires, and brake pads with your vehicle, it also adjusts the steering angle and turns off the oil light. Looking to restore your car to its original condition? Look no further than the ArtiDiag500.
- [Multiple Functions] The Smart AutoVIN of this TOPDON OBD2 scanner keeps track of your manual selections for vehicle make, model, and year and directs you to the suitable diagnostics. Max 4 Live Data streams integrated for much easier data processing. Diagnostic feedback online with this diagnostic tool to help you get tough repair operations well-completed. Real-time car battery voltage monitoring identifies probable vehicle defects.
- [Wide Vehicle Coverage] ArtiDiag500 currently supports 67+ car brands, 10,000+ models, covering most vehicles worldwide. Supports cutting-edge CAN FD protocols, making it compatible with modern vehicles including 2020+ GM & Chrysler. It supports FCA AutoAuth (official Secure Gateway access) to stay up to date with newer models from Chrysler, Jeep, Fiat, and others. Plus, it's fully compatible with Android 11 for smoother use. Note: Please charge AD500 regularly to maintain battery performance and prevent power-on issues caused by prolonged periods of non-use.
SEOCONTENT-START
The repair information in this document is intended for use only by skilled technicians who have the proper tools, equipment and training to correctly and safely maintain your vehicle. These
procedures are not intended to be attempted by “do-it-yourselfers,” and you should not assume this document applies to your vehicle, or that your vehicle has the condition described. To
determine whether this information applies, contact an authorized Audi dealer. 2023 Audi of America, Inc. and Audi Canada. All Rights Reserved.
May 2023 69FA Page 1 of 34
Compliance Recall
Code: 69FA
Subject
B-pillar Door Seal
Release Date
May 04, 2023
Affected Vehicles
Country
Beginning Model Year
Ending Model Year
Vehicle
Vehicle Count
USA
2022
2023
Q4 E-TRON SPORTBACK
900
USA
2022
2023
Q4 E-TRON SUV
4,324
CAN
2022
2023
Q4 E-TRON SPORTBACK
139
CAN
2022
2023
Q4 E-TRON SUV
964
Check Campaigns/Actions screen in Elsa on the day of repair to verify that a VIN qualifies for repair under this action. Elsa is the only valid campaign inquiry & verification source.
Campaign status must show “open.”
If Elsa shows other open action(s), inform your customer so that the work can also be completed at the same time the vehicle is in the workshop for this campaign.
Problem Description
In a crash with head curtain airbag deployment, the airbag could deform the door seal and expose the metal inlay within the seal. If the exposed metal tears the airbag, the airbag would not be able to protect occupants as designed, increasing the risk of injury. Because of this, the vehicles included in this recall may not fully comply with the requirements of an airbag test according to FMVSS/CMVSS No. 226, “Ejection Mitigation”.
Corrective Action
Install cloth tape in driver and front passenger B-pillar area to secure the door seal in place.
Code Visibility
On April 03, 2023, the campaign code was applied to affected vehicles.
Owner Notification
Owner notification will take place in May 2023. Owner letter examples are included in this bulletin for your reference.
Additional Information
Please alert everyone in your dealership about this action, including Sales, Service, Parts and Accounting personnel. Contact Warranty if you have any questions.
IMPORTANT REMINDER ON VEHICLES AFFECTED BY SAFETY & COMPLIANCE RECALLS
New Vehicles in Dealer Inventory: It is a violation of federal law for a dealer to deliver a new motor vehicle or any new or used item of motor vehicle equipment (including a tire) covered by this notification under a sale or lease until the defect or noncompliance is remedied. By law, dealers must correct, prior to delivery for sale or lease, any vehicle that fails to comply with an applicable Federal Motor Vehicle Safety Standard or that contains a defect relating to motor vehicle safety.
Pre-Owned Vehicles in Dealer Inventory: Dealers should not deliver any pre-owned vehicles in their inventory which are involved in a safety or compliance recall until the defect has been remedied.
Dealers must ensure that every affected inventory vehicle has this campaign completed before delivery to consumers.
The information in this document is intended for use only by skilled technicians who have the proper tools, equipment and training to correctly and safely maintain your vehicle. These procedures
are not intended to be attempted by “do-it-yourselfers,” and you should not assume this document applies to your vehicle, or that your vehicle has the condition described. To determine whether
this information applies, contact an authorized Audi dealer. 2023 Audi Group of America, Inc. and Audi Canada. All Rights Reserved.
May 2023 69FA Page 2 of 34
Parts Information
Parts Control Type:
Upper Order Limit
Parts will be managed with a weekly Upper Order Limit. Please see Parts On Command (POC) for your Upper Order Limit quantity.
Parts Control Type:
Free Order
Parts will be managed by Free Order
Initial Allocation:
YES
Dealers will be sent an initial allocation prior to customer notification. If no initial allocation was received, please reference the Repair Projection Tool (below) to view your potential VIN population.
Repair Projection Tool:
(right click to open)
Criteria
Quantity
Part Number
P.O.C. Part Description
Ordering Method
F4
500 mm
D -437-S40-A2
TAPE
Upper Order Limit
2
4L0-886-373
GROMMET
Free Order
NOTE
The specified part numbers reflect the status at the start of this action. Interim updates made in ETKA can cause a listed part number to become unavailable. In this case, the new part number specified in ETKA should be used.
The repair information in this document is intended for use only by skilled technicians who have the proper tools, equipment and training to correctly and safely maintain your vehicle. These
procedures are not intended to be attempted by “do-it-yourselfers,” and you should not assume this document applies to your vehicle, or that your vehicle has the condition described. To
determine whether this information applies, contact an authorized Audi dealer. 2023 Audi of America, Inc. and Audi Canada. All Rights Reserved.
May 2023 69FA Page 3 of 34
Claim Entry Instructions
The labor times listed here may differ from the labor operations and labor times listed in ELSA.
After campaign has been completed, enter claim as soon as possible to help prevent work from being duplicated elsewhere. Attach the Elsa screen print showing action open on the day of repair to the repair order.
If customer refused campaign work:
U.S. dealers: Submit the request through Audi Warranty Online under the Campaigns/Update option.
Canada dealers: Upload the repair order [signed by customer] to Audi WIN/Operations/Campaign Closure.
Service Number
69FA
Damage Code
0099
Parts Vendor Code
002
Claim Type
Sold vehicle: 7 10
Unsold vehicle: 7 90
Causal Indicator
Mark TAPE* as causal part
Vehicle Wash/Loaner
Do not claim wash/loaner under this action
Criteria I.D.
F4
LABOR
Labor Op
Time Units
Description
7084 23 99
270
Lower headliner and apply adhesive tape
(without panoramic sunroof)
OR
7084 24 99
280
Lower headliner and apply adhesive tape
(with panoramic sunroof)
AND
0151 00 00
Time stated on
diagnostic protocol
GFF Operations
(if necessary)
0121 00 04
10
Test drive
(if necessary)
PARTS
Quantity
Part Number
Description
0.04
D 437S40A2
TAPE*
2.00
4L0886373
GROMMET
The repair information in this document is intended for use only by skilled technicians who have the proper tools, equipment and training to correctly and safely maintain your vehicle. These
procedures are not intended to be attempted by “do-it-yourselfers,” and you should not assume this document applies to your vehicle, or that your vehicle has the condition described. To
determine whether this information applies, contact an authorized Audi dealer. 2023 Audi of America, Inc. and Audi Canada. All Rights Reserved.
May 2023 69FA Page 4 of 34
Customer Letter Example (USA)
This notice applies to your vehicle: ,
NHTSA: 23V189
Subject: Compliance Recall 69FA – B-pillar Door Seal
Dear Audi Owner,
This notice is sent to you in accordance with the National Traffic and Motor Vehicle Safety Act. Audi has decided that certain 2022-2023 model year Audi vehicles fail to conform to Federal Motor Vehicle Safety Standard No. 226, “Ejection Mitigation.” Our records show that you are the owner of a vehicle affected by this action.
What is the issue?
In a crash with head curtain airbag deployment, the airbag could deform the door seal and expose the metal inlay within the seal. If the exposed metal tears the airbag, the airbag would not be able to protect occupants as designed, increasing the risk of injury. Because of this, the vehicles included in this recall may not fully comply with the requirements of an airbag test according to Federal Motor Vehicle Safety Standard No. 226, “Ejection Mitigation”.
What will we do?
To correct this noncompliance, your authorized Audi dealer will install cloth tape in driver and front passenger B-pillar area to secure the door seal in place. This work will take about four hours to complete and will be performed for you free of charge. Please keep in mind that your dealer may need additional time for the preparation of the repair, as well as to accommodate their daily workshop schedule.
What should you do?
Please contact your authorized Audi dealer without delay to schedule this recall repair. For your convenience, you can also visit www.audiusa.com and click on the “Find a Dealer” link to locate a dealer near you and schedule this service.
Lease vehicles and address changes
If you are the lessor and registered owner of the vehicle identified in this action, the law requires you to forward this letter immediately via first-class mail to the lessee within ten (10) days of receipt. If you have changed your address or sold the vehicle, please fill out the enclosed prepaid Owner Reply card and mail it to us so we can update our records.
Can we assist you further?
If your authorized Audi dealer fails or is unable to complete this work free of charge within a reasonable time, please contact Audi Customer Experience at 1-800-253-2834 or via our “Contact Us” page at www.audiusa.com.
Checking your vehicle for open Recalls and Service Campaigns
To check your vehicle’s eligibility for repair under this or any other recall/service campaign, please visit the Recall/Service Campaign Lookup tool at www.audiusa.com and enter your Vehicle Identification Number (VIN).
If you still cannot obtain satisfaction, you may file a complaint with: The Administrator, National Highway Traffic Safety Administration, 1200 New Jersey Avenue, SE., Washington, DC 20590; or call the toll-free Vehicle Safety Hotline at 1-888-327-4236 (TTY: 1-800-424-9153); or go to http://www.safercar.gov.
We apologize for any inconvenience this matter may cause; however we are taking this action to help ensure your safety and continued satisfaction with your vehicle.
Sincerely,
Audi Customer Protection
The repair information in this document is intended for use only by skilled technicians who have the proper tools, equipment and training to correctly and safely maintain your vehicle. These
procedures are not intended to be attempted by “do-it-yourselfers,” and you should not assume this document applies to your vehicle, or that your vehicle has the condition described. To
determine whether this information applies, contact an authorized Audi dealer. 2023 Audi of America, Inc. and Audi Canada. All Rights Reserved.
May 2023 69FA Page 5 of 34
Customer Letter Example (Canada)
This notice applies to your vehicle: ,
Transport Canada Recall: 2023-163
Subject: Compliance Recall 69FA – B-pillar Door Seal
Dear Audi Owner,
This notice is sent to you in accordance with the requirements of the Motor Vehicle Safety Act. This is to inform you that your vehicle may be non-compliant with the requirements of the Motor Vehicle Safety Regulations and that the non-compliance could affect the safety of a person. Our records show that you are the owner of a vehicle affected by this action.
What is the issue?
In a crash with head curtain airbag deployment, the airbag could deform the door seal and expose the metal inlay within the seal. If the exposed metal tears the airbag, the airbag would not be able to protect occupants as designed, increasing the risk of injury. Because of this, the vehicles included in this recall may not fully comply with the requirements of an airbag test according to Canada Motor Vehicle Safety Standard No. 226, “Ejection Mitigation”.
What will we do?
To correct this noncompliance, your authorized Audi dealer will install cloth tape in driver and front passenger B-pillar area to secure the door seal in place. This work will take about four hours to complete and will be performed for you free of charge. Please keep in mind that your dealer may need additional time for the preparation of the repair, as well as to accommodate their daily workshop schedule.
What should you do?
Please contact your authorized Audi dealer without delay to schedule this recall repair.
Lease vehicles and address changes
If you are the lessor and registered owner of the vehicle identified in this letter, you shall forward this letter (and any subsequent notice, if applicable) to the lessee within ten (10) days of receipt. If you have changed your address or sold the vehicle identified in this letter, please fill out the enclosed prepaid Owner Reply Card and mail it to us so we can update our records.
Can we assist you further?
If your authorized Audi dealer fails or is unable to complete this work free of charge within a reasonable time, please contact Audi Customer Relations Monday through Friday from 8AM to 8PM EST at 1-800-822-2834 or via our “Contact Audi Canada” page at www.audi.ca.
We apologize for any inconvenience this matter may cause; however we are taking this action to help ensure your safety and continued satisfaction with your vehicle.
Sincerely,
Audi Customer Protection
The repair information in this document is intended for use only by skilled technicians who have the proper tools, equipment and training to correctly and safely maintain your vehicle. These
procedures are not intended to be attempted by “do-it-yourselfers,” and you should not assume this document applies to your vehicle, or that your vehicle has the condition described. To
determine whether this information applies, contact an authorized Volkswagen dealer. 2023 Volkswagen Group of America, Inc. and Volkswagen Canada. All Rights Reserved.
May 2023 69FA Page 6 of 34
Repair Overview
• Lower headliner and apply adhesive tape to both front door seals and body.
NOTE
• These repair instructions may differ from the labor operations and labor times listed in ELSA.
• Damages resulting from improper repair or failure to follow these work instructions are the dealer’s responsibility and are not eligible for reimbursement under this action.
• This procedure must be read in its entirety prior to performing the repair.
• Due to variations in vehicle equipment and options, the steps/illustrations in this work procedure may not identically match all affected vehicles.
• Diagnosis and repair of pre-existing conditions in the vehicle are not covered under this action.
• When working during extreme temperatures, it is recommended that the vehicle be allowed to acclimate inside the shop to avoid temperature-related component damage/breakage.
The repair information in this document is intended for use only by skilled technicians who have the proper tools, equipment and training to correctly and safely maintain your vehicle. These
procedures are not intended to be attempted by “do-it-yourselfers,” and you should not assume this document applies to your vehicle, or that your vehicle has the condition described. To
determine whether this information applies, contact an authorized Volkswagen dealer. 2023 Volkswagen Group of America, Inc. and Volkswagen Canada. All Rights Reserved.
May 2023 69FA Page 7 of 34
Required Tools
Pry Lever
-80-200-
(or equivalent)
Omega Clip Tool
-T40280-
(or equivalent)
Release Pliers*
-T10558A-
Release Pliers*
-VAS6427-
*NOTE: If -T10558A- is not available, -VAS6427- can be used instead
Removal Tool
-T40445-
(or equivalent)
Removal Wedge Set
-VAS895015-
(or equivalent)
Wedge Set
-T10383-
(or equivalent)
Release Tool
-T10518A-
Removal Wedge
-T40233-
(or equivalent)
The repair information in this document is intended for use only by skilled technicians who have the proper tools, equipment and training to correctly and safely maintain your vehicle. These
procedures are not intended to be attempted by “do-it-yourselfers,” and you should not assume this document applies to your vehicle, or that your vehicle has the condition described. To
determine whether this information applies, contact an authorized Volkswagen dealer. 2023 Volkswagen Group of America, Inc. and Volkswagen Canada. All Rights Reserved.
May 2023 69FA Page 8 of 34
Repair Instruction
Section A – Check for Previous Repair
• Enter the VIN in Elsa and proceed to the “Campaign/Action” screen.
TIP
On the date of repair, print this screen and keep a copy with the repair order.
• Confirm the Campaign/Action is open . If the status is closed, no further work is required.
• Note the Applicable Criteria ID for use in determining the correct work to be done and corresponding parts associated.
CRITICAL REPAIR STEP
STOP!
If multiple software update Campaign/Actions are open, they must be performed in order of the Start date . The oldest should be performed first.
• All Safety Recalls must be completed prior to completing this campaign.
• Proceed to Section B.
The repair information in this document is intended for use only by skilled technicians who have the proper tools, equipment and training to correctly and safely maintain your vehicle. These
procedures are not intended to be attempted by “do-it-yourselfers,” and you should not assume this document applies to your vehicle, or that your vehicle has the condition described. To
determine whether this information applies, contact an authorized Volkswagen dealer. 2023 Volkswagen Group of America, Inc. and Volkswagen Canada. All Rights Reserved.
May 2023 69FA Page 9 of 34
Section B – Repair Procedure
WARNING
Risk of injury. Refer to “Warning and Safety Precautions”, found in Appendix A at the end of this document.
Remove front driver and passenger side instrument panel side covers:
• The instructions below for removal of the trim panels show the driver side for reference. The removal of the passenger side components are similar to the driver’s side.
• Unclip the instrument panel side cover <2> from the instrument panel using a suitable trim removal wedge <1> in the direction indicated .
Remove driver and passenger A-Pillar gap covers:
• Loosen the A-pillar gap cover <1> in the area of the inner door seal
• Unclip the A-pillar gap cover <1> starting at the top, using a suitable trim removal wedge, remove the cover in the direction indicated .
The repair information in this document is intended for use only by skilled technicians who have the proper tools, equipment and training to correctly and safely maintain your vehicle. These
procedures are not intended to be attempted by “do-it-yourselfers,” and you should not assume this document applies to your vehicle, or that your vehicle has the condition described. To
determine whether this information applies, contact an authorized Volkswagen dealer. 2023 Volkswagen Group of America, Inc. and Volkswagen Canada. All Rights Reserved.
May 2023 69FA Page 10 of 34
Remove driver and passenger A-Pillar upper trim panels:
• Unclip the cap <2> with a small flat-head screwdriver.
• Remove the bolt <1>.
• Loosen the A-pillar trim panel <1> in the area of the inner door seal.
• Unclip the A-pillar trim panel <1> from the A-pillar in the direction of using a suitable trim removal wedge.
• Pull the A-pillar trim panel <1> upward out of the instrument panel .
• Release and disconnect any connectors.
The repair information in this document is intended for use only by skilled technicians who have the proper tools, equipment and training to correctly and safely maintain your vehicle. These
procedures are not intended to be attempted by “do-it-yourselfers,” and you should not assume this document applies to your vehicle, or that your vehicle has the condition described. To
determine whether this information applies, contact an authorized Volkswagen dealer. 2023 Volkswagen Group of America, Inc. and Volkswagen Canada. All Rights Reserved.
May 2023 69FA Page 11 of 34
Remove driver and passenger side upper B-Pillar trim panels:
• Move seat belt height adjuster to the lowest position.
• Loosen the B-pillar upper trim panel <1> in the area of the inner door seal.
• Unclip the side of the B-pillar upper trim panel <1> in the direction indicated using a commercially available plastic wedge.
• Remove the B-pillar upper trim panel <1> in the direction indicated .
• Carefully place the B-Pillar trim off to the side with the seatbelts still installed.
NOTE
Complete removal of the seatbelt is not needed for this action.
Remove driver and passenger front sill panels:
• Unclip the front sill panel <2> in the direction indicated using a commercially available plastic wedge.
• Unclip the front sill panel <2> from the B-pillar lower trim panel <1> in the direction indicated using a commercially available plastic wedge.
The repair information in this document is intended for use only by skilled technicians who have the proper tools, equipment and training to correctly and safely maintain your vehicle. These
procedures are not intended to be attempted by “do-it-yourselfers,” and you should not assume this document applies to your vehicle, or that your vehicle has the condition described. To
determine whether this information applies, contact an authorized Volkswagen dealer. 2023 Volkswagen Group of America, Inc. and Volkswagen Canada. All Rights Reserved.
May 2023 69FA Page 12 of 34
Rear bench seat removal:
• Move the front seats as far forward as possible.
• Remove the child seat anchor guides.
• Slide the Removal Tool -T40445- or suitable release tool in the area of the wire hook <2> all the way between the bench seat <1> and the bracket. See photo below for an example of the -T40445- in the installed position.
• Press the tool being used upward and carefully pry the bench seat <1> out of the mounting grommet <3> in the direction indicated .
• Repeat the process for the other side .
NOTE
If release tool -T40445- is not available, be sure that the suitable tools being used are placed correctly around the mounting hook before attempting to remove the seat bench.
• Make sure release tool -T40445- is fully installed against the seat wire hook in the direction of . Once seated, pull the release tool upwards to release the seat bench.
The repair information in this document is intended for use only by skilled technicians who have the proper tools, equipment and training to correctly and safely maintain your vehicle. These
procedures are not intended to be attempted by “do-it-yourselfers,” and you should not assume this document applies to your vehicle, or that your vehicle has the condition described. To
determine whether this information applies, contact an authorized Volkswagen dealer. 2023 Volkswagen Group of America, Inc. and Volkswagen Canada. All Rights Reserved.
May 2023 69FA Page 13 of 34
• Raise the front side of the bench seat <1> slightly and slide the wire frame <2> out of the hook <3> in the direction indicated
• Disconnect any connectors that are present.
• Remove the bench seat <1>.
• Replace the seat grommets on both sides.
• See the ELSA repair manual for notes regarding correction of deformations to the wire frame for the seat bench as well as the grommet mounting holes.
o ELSA > Body > Body Interior > Seats > 72 Seat Frames > Rear Seats > Bench Seat/Single seat, Removing and Installing.
Part Number
Part Description
4L0-886-373
Seat Grommet (x2)
The repair information in this document is intended for use only by skilled technicians who have the proper tools, equipment and training to correctly and safely maintain your vehicle. These
procedures are not intended to be attempted by “do-it-yourselfers,” and you should not assume this document applies to your vehicle, or that your vehicle has the condition described. To
determine whether this information applies, contact an authorized Volkswagen dealer. 2023 Volkswagen Group of America, Inc. and Volkswagen Canada. All Rights Reserved.
May 2023 69FA Page 14 of 34
TIP
The black clip inside the grommet <1> can be removed to aid in removal of the white exterior grommet housing.
CAUTION
Risk of rattle!
Pay close attention when removing the grommet. If any pieces fall into the seat frame, this could lead to a rattle concern.
The repair information in this document is intended for use only by skilled technicians who have the proper tools, equipment and training to correctly and safely maintain your vehicle. These
procedures are not intended to be attempted by “do-it-yourselfers,” and you should not assume this document applies to your vehicle, or that your vehicle has the condition described. To
determine whether this information applies, contact an authorized Volkswagen dealer. 2023 Volkswagen Group of America, Inc. and Volkswagen Canada. All Rights Reserved.
May 2023 69FA Page 15 of 34
Remove both rear seat backrests:
• Remove the right rear seat belt latch.
• Disconnect and free up the connector <3> (if so equipped).
• Remove the bolt <1>.
• Remove the right rear seat belt latch <2>.
• Fold the 1/3 seat backrest forward.
• Remove the cover <1> from the center support <2>.
• Remove the bolt <2>.
• Rotate the locking bushing <1> in the direction of , disengage it at the front of the center support , and remove it.
The repair information in this document is intended for use only by skilled technicians who have the proper tools, equipment and training to correctly and safely maintain your vehicle. These
procedures are not intended to be attempted by “do-it-yourselfers,” and you should not assume this document applies to your vehicle, or that your vehicle has the condition described. To
determine whether this information applies, contact an authorized Volkswagen dealer. 2023 Volkswagen Group of America, Inc. and Volkswagen Canada. All Rights Reserved.
May 2023 69FA Page 16 of 34
• Lift the rear seat backrest <2> out in the direction of at the inner mounting pin <3> and remove it in the direction of from the pivot pins <1>.
• Remove the rear seat backrest <2>.
• Repeat for the other backrest.
NOTE
2/3 backrest shown. Procedure is similar for the 1/3 backrest.
Driver and Passenger Rear Sill Panel Removal:
• Remove the bolts <1> at the base of the rear sill panel.
The repair information in this document is intended for use only by skilled technicians who have the proper tools, equipment and training to correctly and safely maintain your vehicle. These
procedures are not intended to be attempted by “do-it-yourselfers,” and you should not assume this document applies to your vehicle, or that your vehicle has the condition described. To
determine whether this information applies, contact an authorized Volkswagen dealer. 2023 Volkswagen Group of America, Inc. and Volkswagen Canada. All Rights Reserved.
May 2023 69FA Page 17 of 34
CAUTION
Risk of consequential damage!
See the procedure below for information on how to disengage the rear sill panel retaining tab.
• Rear sill panel retaining tab <1> shown with panel removed for clarity.
• Locate the rear sill panel retaining tab <1>.
The repair information in this document is intended for use only by skilled technicians who have the proper tools, equipment and training to correctly and safely maintain your vehicle. These
procedures are not intended to be attempted by “do-it-yourselfers,” and you should not assume this document applies to your vehicle, or that your vehicle has the condition described. To
determine whether this information applies, contact an authorized Volkswagen dealer. 2023 Volkswagen Group of America, Inc. and Volkswagen Canada. All Rights Reserved.
May 2023 69FA Page 18 of 34
• Using a suitable commercially available plastic wedge, carefully pry the rear sill panel out slightly in the direction indicated .
• Once the tab is located, insert a commercially available plastic wedge as shown to where it is touching the tab.
• Press the wedge inwards towards the C-Pillar with steady pressure to unlock the tab .
• Once unlocked, remove the rear sill panel.
The repair information in this document is intended for use only by skilled technicians who have the proper tools, equipment and training to correctly and safely maintain your vehicle. These
procedures are not intended to be attempted by “do-it-yourselfers,” and you should not assume this document applies to your vehicle, or that your vehicle has the condition described. To
determine whether this information applies, contact an authorized Volkswagen dealer. 2023 Volkswagen Group of America, Inc. and Volkswagen Canada. All Rights Reserved.
May 2023 69FA Page 19 of 34
• Loosen the rear sill panel <1> using a commercially available plastic wedge.
• Guide the rear three-point seat belt <2> out of the rear sill panel <1>.
Vehicles with Rear Thorax Airbags Only:
CAUTION
Pyrotechnical components can deploy unintentionally. Risk of injury!
Discharge the static electricity: quickly touch the door striker.
• Disconnect the connector for the rear thorax airbag <1>.
The repair information in this document is intended for use only by skilled technicians who have the proper tools, equipment and training to correctly and safely maintain your vehicle. These
procedures are not intended to be attempted by “do-it-yourselfers,” and you should not assume this document applies to your vehicle, or that your vehicle has the condition described. To
determine whether this information applies, contact an authorized Volkswagen dealer. 2023 Volkswagen Group of America, Inc. and Volkswagen Canada. All Rights Reserved.
May 2023 69FA Page 20 of 34
Remove the Driver and Passenger D-Pillar Trim panels (SUV):
• Loosen the D-pillar trim panel in the rear lid seal area.
• Unclip the D-pillar trim panel <2> from the D-pillar using a suitable trim removal wedge <1> in the direction indicated
Remove the Driver and Passenger D-Pillar Trim panels (Sportback):
• Loosen the D-pillar trim panel in the rear lid seal area.
• Unclip the D-pillar trim panel <2> from the D-pillar using a suitable trim removal wedge <1> in the direction indicated
Remove the Driver and Passenger C-Pillar Trim panels (SUV):
• Unclip the C-pillar trim panel <1> from the C-pillar using a suitable trim removal wedge <2> in the direction indicated .
• Remove the C-pillar upper trim panel from the mount on the body in the direction indicated by moving the trim toward the inside and pulling it downward at the same time.
The repair information in this document is intended for use only by skilled technicians who have the proper tools, equipment and training to correctly and safely maintain your vehicle. These
procedures are not intended to be attempted by “do-it-yourselfers,” and you should not assume this document applies to your vehicle, or that your vehicle has the condition described. To
determine whether this information applies, contact an authorized Volkswagen dealer. 2023 Volkswagen Group of America, Inc. and Volkswagen Canada. All Rights Reserved.
May 2023 69FA Page 21 of 34
Remove the Driver and Passenger C-Pillar Trim panels (Sportback):
• Unclip the C-pillar trim panel <1> from the C-pillar using a suitable trim removal wedge <2> in the direction indicated .
• Remove the C-pillar upper trim panel from the mount on the body in the direction indicated by moving the trim toward the inside and pulling it downward at the same time.
Remove the Driver and Passenger Side Sun Visors:
• Pivot the sun visor forward.
• Disengage the sun visor <2> from the sun visor center support <1> and fold it to the side.
• Pry out the caps <3> using a small screwdriver.
The repair information in this document is intended for use only by skilled technicians who have the proper tools, equipment and training to correctly and safely maintain your vehicle. These
procedures are not intended to be attempted by “do-it-yourselfers,” and you should not assume this document applies to your vehicle, or that your vehicle has the condition described. To
determine whether this information applies, contact an authorized Volkswagen dealer. 2023 Volkswagen Group of America, Inc. and Volkswagen Canada. All Rights Reserved.
May 2023 69FA Page 22 of 34
CAUTION
There is a risk of damaging the wires by pulling too hard!
Carefully pull the wires out of the opening.
NOTE
If the -T10558A- release pliers are not available, the -VAS6427- release pliers can be used.
• Position the Release Pliers – T10558A- in the center of the clips <3>.
• Release the front clip <3> (when viewed in the direction of travel) in the sun visor mount <1> using the Release Pliers – T10558A-.
• Pull the sun visor <2> down gently so that the front clip <3> does not engage again.
• Release the rear clip <3> (when viewed in the direction of travel) in the sun visor mount <1> using the Release Pliers – T10558A-.
• Pull the sun visor <2> downward.
• Release and disconnect the connector.
• Remove the clamping plate.
• Remove the sun visor.
Remove the Driver and Passenger Side Sun Visor Center Supports:
• Turn the sun visor center support <1> in the direction indicated .
• Remove the sun visor center support <1> downward.
The repair information in this document is intended for use only by skilled technicians who have the proper tools, equipment and training to correctly and safely maintain your vehicle. These
procedures are not intended to be attempted by “do-it-yourselfers,” and you should not assume this document applies to your vehicle, or that your vehicle has the condition described. To
determine whether this information applies, contact an authorized Volkswagen dealer. 2023 Volkswagen Group of America, Inc. and Volkswagen Canada. All Rights Reserved.
May 2023 69FA Page 23 of 34
Remove the Front Roof Module:
CAUTION
Risk of consequential damage!
Pay attention to the following steps to avoid damage to the roof module.
• DO NOT pry on the front of the roof module <1>. There are two plastic cleats that will be damaged if force is applied.
NOTE
Note the metal retaining tabs <1>. These are present on both sides of the roof module.
• Insert a wedge from Wedge Set -T10383- or a suitable forked wedge into the center area of the roof module as shown <1>.
The repair information in this document is intended for use only by skilled technicians who have the proper tools, equipment and training to correctly and safely maintain your vehicle. These
procedures are not intended to be attempted by “do-it-yourselfers,” and you should not assume this document applies to your vehicle, or that your vehicle has the condition described. To
determine whether this information applies, contact an authorized Volkswagen dealer. 2023 Volkswagen Group of America, Inc. and Volkswagen Canada. All Rights Reserved.
May 2023 69FA Page 24 of 34
• Ensure that the fork of the wedge tool being used goes around the center retaining clip <1>.
• For vehicles with a glass roof panel, open the sunshade before removing the roof module.
• Pry the Front Roof Module <1> down in the direction indicated .
• Move the front roof module <1> in the direction indicated , until the connectors are accessible.
• Disconnect the connectors.
• Remove front roof module <1>.
Remove All Roof Grab Handles:
• Fold down the roof grab handle <1>.
• Unclip the locking caps <2> using a commercially available plastic wedge.
The repair information in this document is intended for use only by skilled technicians who have the proper tools, equipment and training to correctly and safely maintain your vehicle. These
procedures are not intended to be attempted by “do-it-yourselfers,” and you should not assume this document applies to your vehicle, or that your vehicle has the condition described. To
determine whether this information applies, contact an authorized Volkswagen dealer. 2023 Volkswagen Group of America, Inc. and Volkswagen Canada. All Rights Reserved.
May 2023 69FA Page 25 of 34
CAUTION
Risk of damage!
If a grab handle is not releasing, do not apply force. Damage to the handle and the body can occur! Check release tool positioning and correct as needed.
TIP
Review all grab handle instructions before attempting to remove the grab handles.
• Press the Release Tool -T10518A- <2> in the direction indicated until the clip <3> releases.
• Pull the release tool <2> using the roof grab handle <1> opposite the direction indicated .
• Repeat the procedure for the other clip <3> while holding the roof grab handle <1> with tension so that the clip <3> does not engage again.
• Remove the roof grab handle <1>.
• If the -T10518A- is not available, two long, thin, commercially available, flat head screwdrivers <1> can be used to release the grab handle retaining tabs.
• Insert the screwdrivers <1> into the grab handle clip .
The repair information in this document is intended for use only by skilled technicians who have the proper tools, equipment and training to correctly and safely maintain your vehicle. These
procedures are not intended to be attempted by “do-it-yourselfers,” and you should not assume this document applies to your vehicle, or that your vehicle has the condition described. To
determine whether this information applies, contact an authorized Volkswagen dealer. 2023 Volkswagen Group of America, Inc. and Volkswagen Canada. All Rights Reserved.
May 2023 69FA Page 26 of 34
NOTE
One screwdriver shown for clarity. Two screwdrivers are needed.
• Engage the retaining tabs <1> using the screwdrivers .
• Once the screwdrivers are inserted, slightly rotate in the direction indicated to release the retaining tabs.
• Once both retaining tabs <1> have been disengaged, carefully release that end of the grab handle from the roof.
• Repeat these steps for the other clip.
• After both clips have been released, remove the grab handle.
NOTE
Grab handle retaining clip <1> shown removed for clarity. Grab handle retaining tabs shown in the locked position.
NOTE
Grab handle retaining tabs shown in the unlocked position. The retaining tabs must be in this position for the grab handle to be removed.
The repair information in this document is intended for use only by skilled technicians who have the proper tools, equipment and training to correctly and safely maintain your vehicle. These
procedures are not intended to be attempted by “do-it-yourselfers,” and you should not assume this document applies to your vehicle, or that your vehicle has the condition described. To
determine whether this information applies, contact an authorized Volkswagen dealer. 2023 Volkswagen Group of America, Inc. and Volkswagen Canada. All Rights Reserved.
May 2023 69FA Page 27 of 34
Lowering the headliner:
CAUTION
Risk of consequential damage!
As the upper B-pillar trim panels are suspended by the seat belt, be mindful of their positions when moving the seats. Damage to the trim panels and the seats can occur.
• Move the front seats all the way forward and to the lowest position.
• For the following steps, make sure that the Release Pliers -T10558A- are positioned in the center of the clips <2>.
• Release the clips <2> from the headliner frame <1> using the Release Pliers -T10558A-.
• Keep tension on the headliner <1> in the direction indicated , to prevent the loosened clamps <2> from reengaging.
NOTE
If the -T10558A- release pliers are not available, the -VAS6427- release pliers can be used.
• Unclip the headliner <1> at the rear from the center clamps using a suitable trim removal wedge from the body .
• Unclip the headliner from the outer clips with the hooks up to the first front catch of the body .
The repair information in this document is intended for use only by skilled technicians who have the proper tools, equipment and training to correctly and safely maintain your vehicle. These
procedures are not intended to be attempted by “do-it-yourselfers,” and you should not assume this document applies to your vehicle, or that your vehicle has the condition described. To
determine whether this information applies, contact an authorized Volkswagen dealer. 2023 Volkswagen Group of America, Inc. and Volkswagen Canada. All Rights Reserved.
May 2023 69FA Page 28 of 34
Vehicles with screen separator:
• Unclip the headliner <1> with the trim and the bracket <2> in the direction indicated .
• Repeat the procedure on the opposite side.
Vehicles with glass panel:
• Slide a suitable trim removal wedge <2> between the sunroof frame and the headliner <1>.
• Using the trim removal wedge, loosen the headliner all the way around the sunroof frame.
Continuation for all vehicles:
• Carefully guide Pry Lever -80-200- between the headliner and body.
• Release the retaining tabs with Pry Lever -80-200- and lower the headliner.
• Release and disconnect any connectors that are present.
• Lower the headliner and place it on the seats.
The repair information in this document is intended for use only by skilled technicians who have the proper tools, equipment and training to correctly and safely maintain your vehicle. These
procedures are not intended to be attempted by “do-it-yourselfers,” and you should not assume this document applies to your vehicle, or that your vehicle has the condition described. To
determine whether this information applies, contact an authorized Volkswagen dealer. 2023 Volkswagen Group of America, Inc. and Volkswagen Canada. All Rights Reserved.
May 2023 69FA Page 29 of 34
CAUTION
Risk of consequential damage!
Improper handling of the headliner can lead to damage. Do not bend the headliner.
• Carefully move the headliner towards the rear of the vehicle to gain access to the area to be repaired <1>.
NOTE
The headliner does not have to be completely removed from the vehicle to perform the repair.
Applying adhesive tape to the front driver and passenger sides of the vehicle:
Part Number
Part Description
D -437-S40-A2
Tape
• Slightly lift the curtain airbag in the area shown <1> to gain access to where the adhesive tape is to be applied.
The repair information in this document is intended for use only by skilled technicians who have the proper tools, equipment and training to correctly and safely maintain your vehicle. These
procedures are not intended to be attempted by “do-it-yourselfers,” and you should not assume this document applies to your vehicle, or that your vehicle has the condition described. To
determine whether this information applies, contact an authorized Volkswagen dealer. 2023 Volkswagen Group of America, Inc. and Volkswagen Canada. All Rights Reserved.
May 2023 69FA Page 30 of 34
NOTE
Side curtain airbag shown removed for clarity. Do not remove the airbag.
• Use the brackets and cutouts on the body as a reference of where to apply the tape.
• Apply a 250mm strip of adhesive tape to the body in the area shown <1>.
• Repeat application for opposite side of vehicle.
• Before applying the adhesive tape, partially peel the tape backing <1>. This will expose a small portion of the adhesive surface <2> making application easier.
• Once applied, remove the remainder of the tape backing <1> and complete the application.
CAUTION
Risk of airbag malfunction!
Make sure that the tape is applied ONLY to the body of the vehicle and the door seal!
Under no circumstances should the tape be applied to the curtain airbag.
• Tape application example shown <1>.
The repair information in this document is intended for use only by skilled technicians who have the proper tools, equipment and training to correctly and safely maintain your vehicle. These
procedures are not intended to be attempted by “do-it-yourselfers,” and you should not assume this document applies to your vehicle, or that your vehicle has the condition described. To
determine whether this information applies, contact an authorized Volkswagen dealer. 2023 Volkswagen Group of America, Inc. and Volkswagen Canada. All Rights Reserved.
May 2023 69FA Page 31 of 34
Reassemble the vehicle in the reverse order of removal while noting the following:
• Reassembly is in the reverse order of removal.
• Reference the ELSA repair manual if needed.
• Remove any metal clips that remain in the body using omega clip tool -T40280- and reinstall to the trim panel.
• Replace any trim panel clips that have been damaged upon removal.
• Torque the rear seat center bearing securing bolt to 9 Nm.
• Torque the right rear seatbelt latch bolt to 40 Nm.
• Torque the A-pillar trim panel bolts to 3.5 Nm.
Grab handle installation notes post repair:
• The hooks <3> must engage.
• Position the roof grab handle <1> and press on it until it audibly engages in the body.
• Press in the caps <2>.
TIP
The grab handle spacers have retaining tabs which allow the grab handle to be installed and held in the headliner while it is in the lowered position. Pre-installing the spacers and grab handles can aid in reinstallation.
The repair information in this document is intended for use only by skilled technicians who have the proper tools, equipment and training to correctly and safely maintain your vehicle. These
procedures are not intended to be attempted by “do-it-yourselfers,” and you should not assume this document applies to your vehicle, or that your vehicle has the condition described. To
determine whether this information applies, contact an authorized Volkswagen dealer. 2023 Volkswagen Group of America, Inc. and Volkswagen Canada. All Rights Reserved.
May 2023 69FA Page 32 of 34
Clear fault memory from vehicle:
• If necessary, connect the vehicle to ODIS, perform a GFF scan, and clear any faults that may have generated.
CAUTION
If performing a road test to calibrate the three phase drive motor -VX54-, the vehicle will momentarily lose acceleration when the -VX54- calibrates. Ensure the road test is performed in a safe manner.
• The calibration does not have to be performed at the end of the diagnosis; it can be carried out without the diagnosis tester on a test drive above 20 mph/ 35 kph (before returning the vehicle to the customer).
Proceed to Section C
The repair information in this document is intended for use only by skilled technicians who have the proper tools, equipment and training to correctly and safely maintain your vehicle. These
procedures are not intended to be attempted by “do-it-yourselfers,” and you should not assume this document applies to your vehicle, or that your vehicle has the condition described. To
determine whether this information applies, contact an authorized Volkswagen dealer. 2023 Volkswagen Group of America, Inc. and Volkswagen Canada. All Rights Reserved.
May 2023 69FA Page 33 of 34
Section C – Campaign Completion Stamp
Item#: AUD4927ENG
-OR-
Item # AUD4927FRE
• Once the campaign has been completed, the technician should stamp the repair order.
• Stamps are available for ordering through the Compliance Label Ordering Portal.
• Proceed to Section D
Section D – Parts Return/Disposal
Properly store (retain), destroy or dispose of removed parts in accordance with all state/province and local requirements, unless otherwise indicated and/or requested through the Warranty Parts Portal (WPP) for U.S. and the Part Destruction and Core Disposition Report for Canada.
The repair information in this document is intended for use only by skilled technicians who have the proper tools, equipment and training to correctly and safely maintain your vehicle. These
procedures are not intended to be attempted by “do-it-yourselfers,” and you should not assume this document applies to your vehicle, or that your vehicle has the condition described. To
determine whether this information applies, contact an authorized Volkswagen dealer. 2023 Volkswagen Group of America, Inc. and Volkswagen Canada. All Rights Reserved.
May 2023 69FA Page 34 of 34
Appendix A – Warning and Safety Precautions
WARNING
General Safety Precautions when Working with Pyrotechnic Components:
• Pyrotechnic components always contain propellant that generates a gas during combustion. In some components, there is also a supply of pressurized gas to ensure this gas is generated
• This pressurized gas is stored under high pressure in a compressed gas container. Pyrotechnic components are triggered by electrical/mechanical igniters.
• Only trained personnel should perform testing, assembly and servicing work. Airbags do not have a replacement interval.
• Never check with test lamps, voltmeter or ohmmeters.
• Only check pyrotechnic components when they are installed in the vehicle using vehicle diagnosis, testing and information systems approved by the manufacturer.
• When working on pyrotechnic components and the airbag control module, disconnect the battery ground strap while the ignition is switched on. Then cover the negative terminal.
• Wait 10 seconds after disconnecting the battery.
• The ignition must be SWITCHED ON when connecting the battery. There should not be anyone inside the vehicle when doing this.
• Exception: vehicles with batteries in the passenger compartment. In this case, stay outside the range of the airbags and seat belts.
• Wash your hands after touching ignited pyrotechnic components from the restraint system.
• Do not open or repair pyrotechnic components. Use only new components to reduce the risk of injury.
• Do not install pyrotechnic components that have fallen onto a hard surface or show signs of damage.
• Discharge static electricity before handling pyrotechnic components, for example before disconnecting the electrical connector. This can be done by touching grounded metal objects such as the door striker pin.
• Install pyrotechnic components immediately after removing them from their transport packaging. If you must stop working, store the pyrotechnic component in its original transport packaging.
• Do not leave pyrotechnic components lying in the open unattended.
• Do not treat pyrotechnic components with grease, cleaning solutions or similar products.
Do not expose pyrotechnic components to temperatures above 100 ºC, even for brief periods of time.
**************************************************************************************************************
69FA USA
IMPORTANT SAFETY RECALL
This notice applies to your vehicle: ,
NHTSA: 23V189
Subject: Compliance Recall 69FA – B-pillar Door Seal
Dear Audi Owner,
This notice is sent to you in accordance with the National Traffic and Motor Vehicle Safety Act.
Audi has decided that certain 2022-2023 model year Audi vehicles fail to conform to Federal
Motor Vehicle Safety Standard No. 226, “Ejection Mitigation.” Our records show that you are
the owner of a vehicle affected by this action.
What is the issue? In a crash with head curtain airbag deployment, the airbag could
deform the door seal and expose the metal inlay within the seal. If
the exposed metal tears the airbag, the airbag would not be able to
protect occupants as designed, increasing the risk of injury. Because
of this, the vehicles included in this recall may not fully comply with
the requirements of an airbag test according to Federal Motor Vehicle
Safety Standard No. 226, “Ejection Mitigation”.
What will we do? To correct this noncompliance, your authorized Audi dealer will install
cloth tape in driver and front passenger B-pillar area to secure the
door seal in place. This work will take about four hours to complete
and will be performed for you free of charge. Please keep in mind
that your dealer may need additional time for the preparation of the
repair, as well as to accommodate their daily workshop schedule.
What should you do? Please contact your authorized Audi dealer without delay to schedule
this recall repair. For your convenience, you can also visit
www.audiusa.com and click on the “Find a Dealer” link to locate a
dealer near you and schedule this service.
Lease vehicles and
address changes
If you are the lessor and registered owner of the vehicle identified in
this action, the law requires you to forward this letter immediately via
first-class mail to the lessee within ten (10) days of receipt. If you
have changed your address or sold the vehicle, please fill out the
enclosed prepaid Owner Reply card and mail it to us so we can
update our records.
Can we assist you
further?
If your authorized Audi dealer fails or is unable to complete this work
free of charge within a reasonable time, please contact Audi
Customer Experience at 1-800-253-2834 or via our “Contact Us”
page at www.audiusa.com.
Audi of America, Inc.
3800 Hamlin Road
Auburn Hills, MI 48326
+1 800 253 2834
www.audiusa.com
Audi of America, Inc.
IMPORTANT SAFETY RECALL
Checking your vehicle
for open Recalls and
Service Campaigns
To check your vehicle’s eligibility for repair under this or any other
recall/service campaign, please visit the Recall/Service Campaign
Lookup tool at www.audiusa.com and enter your Vehicle
Identification Number (VIN).
If you still cannot obtain satisfaction, you may file a complaint with: The Administrator, National
Highway Traffic Safety Administration, 1200 New Jersey Avenue, SE., Washington, DC 20590;
or call the toll-free Vehicle Safety Hotline at 1-888-327-4236 (TTY: 1-800-424-9153); or go to
http://www.safercar.gov.
We apologize for any inconvenience this matter may cause; however we are taking this action to
help ensure your safety and continued satisfaction with your vehicle.
Sincerely,
Audi Customer Protection
69FA USA
CAMPAÑA DE LLAMADA A REVISIÓN IMPORTANTE POR MOTIVOS DE SEGURIDAD
El presente aviso corresponde a su vehículo: ,
NHTSA: 23V189
Asunto: Campaña de llamada a revisión 69FA: junta de la puerta del pilar B
Estimado propietario de un vehículo Audi:
El presente aviso se le envía de acuerdo con la Ley Nacional de Tráfico y Seguridad de
Vehículos Motorizados de EE. UU. Audi detectó que ciertos vehículos de su marca, modelos
2022-2023, no se ajustan a la norma Federal de Seguridad de Vehículos Motorizados n.º 226,
“Reducción de riesgos de eyección”. Nuestros registros indican que usted es propietario de uno
de los vehículos afectados por esta campaña.
¿Cuál es el problema? En caso de un choque con activación de la bolsa de aire tipo cortina
para protección de la cabeza, la bolsa de aire podría deformar la
junta de la puerta y exponer la lámina de metal en la junta. Si este
metal expuesto rompe la bolsa de aire, esta no podrá proteger a los
pasajeros según su uso previsto, lo que aumenta el riesgo de sufrir
lesiones. Debido a ello, es posible que los vehículos incluidos en
esta campaña de llamada a revisión no cumplan plenamente los
requisitos de una prueba de bolsa de aire de acuerdo con la norma
Federal de Seguridad de Vehículos Motorizados n.º 226, “Reducción
de riesgos de eyección”.
¿Qué haremos? Para corregir esta falta de cumplimiento, su concesionario Audi
autorizado instalará cinta de tela en el área del pilar B del conductor
y el pasajero delantero para asegurar la junta de la puerta en su
lugar. Este servicio se llevará a cabo en unas cuatro horas y se
ofrecerá de forma gratuita. No obstante, considere la posibilidad de
que su concesionario necesite tiempo adicional para la preparación
del servicio y la organización del horario del taller.
¿Qué debe hacer? Comuníquese de inmediato con un concesionario autorizado de Audi
para programar la reparación de esta llamada a revisión. También
puede visitar el sitio www.audiusa.com y hacer clic en “Find a Dealer”
(Buscar concesionario) para encontrar un concesionario cercano a
su domicilio y programar este servicio.
Vehículos rentados y
cambios de dirección
Si usted es el arrendador y propietario registrado del vehículo
identificado en esta campaña, la ley exige que reenvíe esta carta de
inmediato al arrendatario por correo de primera clase en el plazo de
los diez (10) días posteriores a la recepción. Si cambió de dirección o
vendió el vehículo, complete la tarjeta prepagada de respuesta del
Audi of America, Inc.
3800 Hamlin Road
Auburn Hills, MI 48326
+1 800 253 2834
www.audiusa.com
Audi of America, Inc.
CAMPAÑA DE LLAMADA A REVISIÓN IMPORTANTE POR MOTIVOS DE SEGURIDAD
propietario adjunta y envíenosla para que podamos actualizar
nuestros registros.
¿De qué otra forma
podemos ayudarlo?
Si su concesionario Audi autorizado no puede completar esta tarea
de forma gratuita en un plazo razonable o no está en condiciones de
hacerlo, comuníquese con el Centro de experiencia del cliente Audi
al 1-800-253-2834 o a través de la página “Contact Us”
(Contáctenos) en la página www.audiusa.com.
Comprobación de la
elegibilidad de su
vehículo para
campañas de llamada a
revisión o de servicio
vigentes
Si desea comprobar la elegibilidad de su vehículo para una
reparación en el marco de esta o de cualquier otra campaña de
llamada a revisión o de servicio, utilice la herramienta Recall/Service
Campaign Lookup (Búsqueda de campañas de llamada a revisión o
de servicio) en www.audiusa.com e ingrese el número de
identificación del vehículo (VIN).
Si aún no está satisfecho, puede presentar una queja a la siguiente dirección: The
Administrator, National Highway Traffic Safety Administration, 1200 New Jersey Avenue, SE.,
Washington, DC 20590. También puede llamar a la línea directa y gratuita de seguridad de
vehículos al 1-888-327-4236 (TTY: 1-800-424-9153) o ingresar a http://www.safercar.gov.
Le pedimos disculpas por cualquier inconveniente que esto pueda ocasionarle; sin embargo,
estamos tomando estas medidas para garantizar su seguridad y su continua satisfacción con el
vehículo.
Atentamente,
Defensa del Consumidor de Audi
**************************************************************************************************************
AUDI DEALER COMMUNICATION
Ensure all dealership personnel are aware of this notice so they are able to address customer questions. Contact Warranty if you require
additional assistance. Direct press inquiries to Audi Public Relations.
Audi Customer Protection 69FA_DLR_LAUNCH
Repair Available – Compliance Recall 69FA / B-pillar Door Seal
This notice is for: Service Manager
Parts Manager
Service Advisor
Warranty Administrator
Technicians
Date:
Dealer Principal
General Manager
Sales Managers
Issue:
May 03, 2023
In a crash with head curtain airbag deployment, the airbag could deform the door seal
and expose the metal inlay within the seal. If the exposed metal tears the airbag, the
airbag would not be able to protect occupants as designed, increasing the risk of injury.
Because of this, the vehicles included in this recall may not fully comply with the
requirements of an airbag test according to FMVSS/CMVSS No. 226, “Ejection
Mitigation”.
Repair: • REPAIR AVAILABLE – May 04, 2023 – Install cloth tape in driver and front
passenger B-pillar area to secure the door seal in place
• See ELSA/ServiceNet for complete repair & claiming instructions
• Check daily campaign open inventory report or OMD for affected vehicles in
inventory
• Repair every affected inventory vehicle before delivery to consumers.
Parts Department: Dealers will be sent an initial allocation prior to customer notification. If no initial
allocation was received, please reference the Repair Projection Tool to view your
potential VIN population.
Affected Vehicles Country Beginning
Model Year
Ending
Model Year Vehicle Vehicle
Count
USA 2022 2023 Q4 E‐TRON SPORTBACK 900
USA 2022 2023 Q4 E‐TRON SUV 4,324
CAN 2022 2023 Q4 E‐TRON SPORTBACK 139
CAN 2022 2023 Q4 E‐TRON SUV 964
*Counts reflect overall population; some vehicles may have already been repaired. Check Campaigns/Actions
screen in Elsa on the day of repair to verify that a VIN qualifies for repair under this action. Elsa is the only valid
campaign inquiry & verification source.
Notes: Schedule owner repairs immediately
Owner mailing – May 2023
IMPORTANT REMINDER: VEHICLES AFFECTED BY SAFETY & COMPLIANCE RECALLS
New Vehicles in Dealer Inventory: It is a violation of federal law for a dealer to deliver a new
motor vehicle or any new or used item of motor vehicle equipment (including a tire) covered by
this notification under a sale or lease until the defect or noncompliance is remedied. By law,
dealers must correct, prior to delivery for sale or lease, any vehicle that fails to comply with an
applicable Federal Motor Vehicle Safety Standard or that contains a defect relating to motor
vehicle safety.
Pre-Owned Vehicles in Dealer Inventory: Dealers should not deliver any pre-owned vehicles in
their inventory which are involved in a safety or compliance recall until the defect has been
remedied.
-END OF MESSAGE
**************************************************************************************************************
AUDI DEALER COMMUNICATION
Ensure all dealership personnel are aware of this notice so they are able to address customer questions. Contact Warranty if you require
additional assistance. Direct press inquiries to Audi Public Relations.
Audi Customer Protection 69FA_DLR_ADV
Advance Notice – Compliance Recall 69FA / B-pillar Door Seal
This notice is for:
Dealer Principal
General Manager
Sales Managers
Service Manager
Parts Manager
Service Advisor
Warranty Administrator
Technicians
Date:
April 3, 2023
Issue:
In a crash with head curtain airbag deployment, the airbag could deform the door seal and expose the metal inlay within the seal. If the exposed metal tears the airbag, the airbag would not be able to protect occupants as designed, increasing the risk of injury. Because of this, the vehicles included in this recall may not fully comply with the requirements of an airbag test according to FMVSS/CMVSS No. 226, “Ejection Mitigation”.
Repair:
• REPAIR NOT YET AVAILABLE
• Check daily campaign open inventory report or OMD for affected vehicles in inventory.
• Audi is working to make a recall remedy available as soon as possible for the affected vehicles. Dealers and owners will be notified in writing once the recall remedy work can be performed.
Affected Vehicles
Country
Beginning Model Year
Ending Model Year
Vehicle
Vehicle Count
USA
2022
2023
Q4 E-TRON SPORTBACK
900
USA
2022
2023
Q4 E-TRON SUV
4,324
CAN
2022
2023
Q4 E-TRON SPORTBACK
139
CAN
2022
2023
Q4 E-TRON SUV
964
*Counts reflect overall population; some vehicles may have already been repaired. Check Campaigns/Actions screen in Elsa on the day of repair to verify that a VIN qualifies for repair under this action. Elsa is the only valid campaign inquiry & verification source.
Notes:
IMPORTANT REMINDER: VEHICLES AFFECTED BY SAFETY & COMPLIANCE RECALLS
New Vehicles in Dealer Inventory: It is a violation of federal law for a dealer to deliver a new motor vehicle or any new or used item of motor vehicle equipment (including a tire) covered by this notification under a sale or lease until the defect or noncompliance is remedied. By law, dealers must correct, prior to delivery for sale or lease, any vehicle that fails to comply with an applicable Federal Motor Vehicle Safety Standard or that contains a defect relating to motor vehicle safety.
Pre-Owned Vehicles in Dealer Inventory: Dealers should not deliver any pre-owned vehicles in their inventory which are involved in a safety or compliance recall until the defect has been remedied.
-END OF MESSAGE-
**************************************************************************************************************
OMB Control No.: 2127-0004
Part 573 Safety Recall Report 23V-189
The information contained in this report was submitted pursuant to 49 CFR §573
Manufacturer Name : Submission Date :
Volkswagen Group of America, Inc. MAR 22, 2023 NHTSA Recall No. : 23V-189 Manufacturer Recall No. : 69FA Manufacturer Information :
Manufacturer Name : Volkswagen Group of America, Inc.
Address : 3800 Hamlin Road
Auburn Hills MI 48326 Company phone : 1-800-893-5298 Population :
Number of potentially involved : 5,224 Estimated percentage with defect : 7 % Vehicle Information : Vehicle 1 : 2022-2023 AUDI Q4 E-TRON SUV
Vehicle Type : Body Style :
Power Train : NR
Descriptive Information : The recall population was determined by records of the vehicle assembly information. The recalled products differ from products that were not included in the recall because production records show that recalled vehicles were assembled without an additional fixation for the door sealing in the area of the B-pillar.
Q4 E-TRON SUV: 4324
Production Dates : SEP 20, 2021 – JAN 09, 2023 VIN Range 1 : Begin : WA1M2AFZXPP011347 End : WA1BCBFZ8PP024513 ✔ Not sequential Vehicle 2 : 2022-2023 AUDI Q4 E-TRON SPORTBACK
Vehicle Type : Body Style :
Power Train : NR
Descriptive Information : The recall population was determined by records of the vehicle assembly information. The recalled products differ from products that were not included in the recall because production records show that recalled vehicles were assembled without an additional fixation for the door sealing in the area of the B-pillar.
Q4 E-TRON SPORTBACK: 900
Production Dates : SEP 27, 2021 – JAN 09, 2023 VIN Range 1 : Begin : WA132BFZ5NP014350 End : WA132BFZ3PP024412 ✔ Not sequential Part 573 Safety Recall Report 23V-189 Page 2 Description of Noncompliance : Description of the Noncompliance : In a crash with head curtain airbag deployment, the airbag could deform the door seal and expose the metal inlay within the seal. If the exposed metal tears the airbag, the airbag would not be able to protect occupants as designed, increasing the risk of injury. Because of this, the vehicles included in this recall may not fully comply with the requirements of an airbag test according to Federal Motor Vehicle Safety Standard (FMVSS) No. 226, “Ejection Mitigation”. FMVSS 1 : 226 – Ejection mitigation FMVSS 2 : NR
Description of the Safety Risk : If the exposed metal tears the airbag, the airbag would not be able to protect occupants as designed, increasing the risk of injury.
Description of the Cause : Due to slightly overlapping metal parts of the body shell in the area of the B- pillar, the door sealing does not lie flat. This, in combination with the U.S.- specific airbag and interior elements, leads to the described behavior. Identification of Any Warning
that can Occur : none Involved Components : Component Name 1 : NR Component Description : NR Component Part Number : NR Supplier Identification : Component Manufacturer
Name : AUDI AG
Address : NR
Foreign States 85045 Country : Germany Chronology :
November 15, 2022: After performing a head-airbag test, as part of the conformity of production monitoring, it was discovered that the airbag material was locally damaged. The sample size was immediately increased and an analysis started. The information contained in this report was submitted pursuant to 49 CFR §573 Part 573 Safety Recall Report 23V-189
Page 3
The information contained in this report was submitted pursuant to 49 CFR §573
December 2022 – February 2023: A second test also led to a local damage of the airbag material. All vehicles still in the production line were blocked and the analyses of the root cause was continued. A countermeasure that fastens the door seal in the B-pillar area was introduced in production. The topic was submitted to the Audi Product Safety Committee. The affected scope of vehicles in the field was verified. March 15, 2023: The Audi Product Safety Committee decides a noncompliance recall. Audi is not aware of any warranty claims, customer complaints or other field reports due to this issue.
Description of Remedy :
Description of Remedy Program : Cloth tape will be installed in driver and front passenger B-pillar area to
secure the door seal in place.
Audi will not offer a reimbursement plan under this recall.
How Remedy Component Differs from Recalled Component :
No parts are being replaced. The remedy component is a cloth tape with the part number D437S40A2.
Identify How/When Recall Condition was Corrected in Production :
Vehicles produced after January 10, 2023 include an additional fixation for the door sealing in the area of the B-pillar.
Recall Schedule :
Description of Recall Schedule : Dealers/owners: On or before May 19, 2023 Planned Dealer Notification Date : MAY 19, 2023 – MAY 19, 2023
Planned Owner Notification Date : MAY 19, 2023 – MAY 19, 2023
* NR – Not Reported
SEOCONTENT-END
This product presentation was made with AAWP plugin.