
NHTSA ID Number: 10161708
Manufacturer Communication Number: A6919402051242_4
Summary
This bulletin contains instructions for correcting DTC B1225F1.
10 Affected Products
Vehicles
Customer states:
- Airbag warning lamp is illuminated in the driver information system (DIS).
- Customer may also report that the passenger airbag indicator lamp in the overhead console may show that the airbag is off.
Workshop findings:
The following DTC is stored in the airbag control module, J234 (address word 0015):
- DTC B1225F1 (Seat occupied recognition sensor mat Shield wire, open circuit).
Note:
If the DTC is static, do not disconnect the tester and contact TAC (Technical Assistance Center) for further instructions.
Production Solution
There is a concern with the aluminum shielding on the PODS harness under the seat that is causing the DTC B1225F1 to occur. The aluminum sleeve isn’t fitted tight enough to the harness, a small amount of interference is possible and causes the fault.
The service solution is to apply cable ties at two different points of the harness under the seat which tightens the fit of the aluminum shielding and corrects the issue.
SEOCONTENT-START
Page 1 of 9
© 2019 Audi of America, Inc.
All rights reserved. Information contained in this document is based on the latest information available at the time of printing and is subject to the copyright and other intellectual property rights of Audi of
America, Inc., its affiliated companies and its licensors. All rights are reserved to make changes at any time without notice. No part of this document may be reproduced, stored in a retrieval system, or transmitted
in any form or by any means, electronic, mechanical, photocopying, recording, or otherwise, nor may these materials be modified or reposted to other sites, without the prior expressed written permission of the
publisher.
69 Airbag warning light on, DTC B1225F1 stored in the airbag control module
69 19 40 2051242/4 June 26, 2019. Supersedes Technical Service Bulletin Group 69 number 19-39 dated April 26, 2019 for reasons listed below.
Model(s)
Year
VIN Range
Vehicle-Specific Equipment
A5, Q5
2018 – 2019
All
Not Applicable
A4, Q7
2017 – 2019
All
Not Applicable
Condition
REVISION HISTORY
Revision
Date
Purpose
4
–
Revised header (Added Q5)
Revised Service (Added Q5 procedure)
3
04/26/2019
Revised header (Added model years)
2
10/05/2018
Revised header data (Added models and model years)
Revised Service (Updated photos and added Note)
Customer states:
Airbag warning lamp is illuminated in the driver information system (DIS).
Customer may also report that the passenger airbag indicator lamp in the overhead console may show that the airbag is off.
Workshop findings:
The following DTC is stored in the airbag control module, J234 (address word 0015):
DTC B1225F1 (Seat occupied recognition sensor mat Shield wire, open circuit).
Note:
If the DTC is static, do not disconnect the tester and contact TAC (Technical Assistance Center) for further instructions.
Technical Background
Not applicable.
Page 2 of 9
© 2019 Audi of America, Inc.
All rights reserved. Information contained in this document is based on the latest information available at the time of printing and is subject to the copyright and other intellectual property rights of Audi of
America, Inc., its affiliated companies and its licensors. All rights are reserved to make changes at any time without notice. No part of this document may be reproduced, stored in a retrieval system, or transmitted
in any form or by any means, electronic, mechanical, photocopying, recording, or otherwise, nor may these materials be modified or reposted to other sites, without the prior expressed written permission of the
publisher.
Production Solution
There is a concern with the aluminum shielding on the PODS harness under the seat that is causing the DTC B1225F1 to occur. The aluminum sleeve isn’t fitted tight enough to the harness, a small amount of interference is possible and causes the fault.
The service solution is to apply cable ties at two different points of the harness under the seat which tightens the fit of the aluminum shielding and corrects the issue.
Service
A4, A5, and Q7
1.
To apply the cable ties, the seat does not need to be removed. You will need to move the lateral seat adjustment all the way to rearmost adjustment limit and the vertical height adjustment all the way to the upper adjustment limit.
Once the seat is adjusted to the above-mentioned position, you will see the need to attach the cable ties at two points on the harness as shown (Figure 1).
Page 3 of 9
© 2019 Audi of America, Inc.
All rights reserved. Information contained in this document is based on the latest information available at the time of printing and is subject to the copyright and other intellectual property rights of Audi of
America, Inc., its affiliated companies and its licensors. All rights are reserved to make changes at any time without notice. No part of this document may be reproduced, stored in a retrieval system, or transmitted
in any form or by any means, electronic, mechanical, photocopying, recording, or otherwise, nor may these materials be modified or reposted to other sites, without the prior expressed written permission of the
publisher.
Figure 1. Positions of the cable ties.
Note:
You are not going to secure the harness to any part of the seat with the cable ties, you are only applying the cable ties to the harness to apply clamping force to the harness and shielding. DO NOT ATTACH THE HARNESS TO THE SEAT FRAME.
2.
You will attach the first cable tie in the yellow marked area on the harness between the cable tie clip and the crossbar tube as shown below (Figure 2).
Page 4 of 9
© 2019 Audi of America, Inc.
All rights reserved. Information contained in this document is based on the latest information available at the time of printing and is subject to the copyright and other intellectual property rights of Audi of
America, Inc., its affiliated companies and its licensors. All rights are reserved to make changes at any time without notice. No part of this document may be reproduced, stored in a retrieval system, or transmitted
in any form or by any means, electronic, mechanical, photocopying, recording, or otherwise, nor may these materials be modified or reposted to other sites, without the prior expressed written permission of the
publisher.
Figure 2. Attach the first cable tie in the yellow area.
3.
The second cable tie position is to the rear of the crossbar tube where the harness drops down from the frame. Place the cable tie in the yellow marked area shown below (Figure 3).
Page 5 of 9
© 2019 Audi of America, Inc.
All rights reserved. Information contained in this document is based on the latest information available at the time of printing and is subject to the copyright and other intellectual property rights of Audi of
America, Inc., its affiliated companies and its licensors. All rights are reserved to make changes at any time without notice. No part of this document may be reproduced, stored in a retrieval system, or transmitted
in any form or by any means, electronic, mechanical, photocopying, recording, or otherwise, nor may these materials be modified or reposted to other sites, without the prior expressed written permission of the
publisher.
Figure 3. Attach the second cable tie to the yellow marked area.
Note:
When tightening the cable ties, only tighten them with your hands, do not use any tools to tighten the cable tie as this can damage the harness. Check that the cable ties cannot be rotated on the harness by hand, to ensure that proper tension is achieved. Then cut off the excess length from the tie wrap.
4.
Once you have the cable ties properly secured and installed, return the seat to the original position and clear the faults stored in the system.
Q5
Page 6 of 9
© 2019 Audi of America, Inc.
All rights reserved. Information contained in this document is based on the latest information available at the time of printing and is subject to the copyright and other intellectual property rights of Audi of
America, Inc., its affiliated companies and its licensors. All rights are reserved to make changes at any time without notice. No part of this document may be reproduced, stored in a retrieval system, or transmitted
in any form or by any means, electronic, mechanical, photocopying, recording, or otherwise, nor may these materials be modified or reposted to other sites, without the prior expressed written permission of the
publisher.
1.
To apply the cable ties, the seat does not need to be removed. You will need to move the lateral seat adjustment all the way to rearmost adjustment limit and the vertical height adjustment all the way to the upper adjustment limit.
Once the seat is adjusted to the above-mentioned position, you will see the need to attach the cable tie at two points on the harness as shown (Figure 4-6).
Figure 4. Positions of the cable ties (front to back).
Page 7 of 9
© 2019 Audi of America, Inc.
All rights reserved. Information contained in this document is based on the latest information available at the time of printing and is subject to the copyright and other intellectual property rights of Audi of
America, Inc., its affiliated companies and its licensors. All rights are reserved to make changes at any time without notice. No part of this document may be reproduced, stored in a retrieval system, or transmitted
in any form or by any means, electronic, mechanical, photocopying, recording, or otherwise, nor may these materials be modified or reposted to other sites, without the prior expressed written permission of the
publisher.
Figure 5. Positions of the cable ties (back to front).
Note:
You are not going to secure the harness to any part of the seat with the cable ties, you are only applying the cable ties to the harness to apply clamping force to the harness and shielding. DO NOT ATTACH THE HARNESS TO THE SEAT FRAME.
2.
You will attach the first cable tie in the yellow marked area on the harness between the cable tie clip and the crossbar tube (Figure 2).
3.
The second cable tie position is to the rear of the black 8-pin connector (T8m) for the backrest and lumbar adjustment and in front of the harness push pin (Figure 6).
Figure 6. Position of second cable tie behind the 8-pin connector.
Page 8 of 9
© 2019 Audi of America, Inc.
All rights reserved. Information contained in this document is based on the latest information available at the time of printing and is subject to the copyright and other intellectual property rights of Audi of
America, Inc., its affiliated companies and its licensors. All rights are reserved to make changes at any time without notice. No part of this document may be reproduced, stored in a retrieval system, or transmitted
in any form or by any means, electronic, mechanical, photocopying, recording, or otherwise, nor may these materials be modified or reposted to other sites, without the prior expressed written permission of the
publisher.
Note:
When tightening the cable ties, only tighten them with your hands, do not use any tools to tighten the cable tie as this can damage the harness. Check that the cable ties cannot be rotated on the harness by hand, to ensure that proper tension is achieved. Then cut off the excess length from the tie wrap.
4.
Once you have the cable ties properly secured and installed, return the seat to the original position and clear the faults stored in the system.
Warranty
Claim Type:
110 up to 48 Months/50,000 Miles.
G10 for CPO Covered Vehicles – Verify Owner.
If the vehicle is outside any warranty, this Technical Service Bulletin is informational only.
Service Number:
7210
Damage Code:
0018
Labor Operations:
Seat Wiring Harness Repair
7210 9999
25 TU
Diagnostic Time:
GFF – Checking and clearing fault codes
0150 0000
20 TU
Road test prior to service procedure
No allowance
0 TU
Road test after service procedure
No allowance
0 TU
Claim Comment:
As per TSB #2051242/4
All warranty claims submitted for payment must be in accordance with the Audi Warranty Policies and Procedures Manual. Claims are subject to review or audit by Audi Warranty.
Required Parts and Tools
Always check with your Parts Department and/or ETKA for the latest information and parts bulletins.
Part Number
Part Description
Quantity
N 90937702
Cable strap
02
See ETKA
Fasteners, Bolts, Nuts, and Screws as needed per the Repair Manual
See ETKA/ELSA
Page 9 of 9
© 2019 Audi of America, Inc.
All rights reserved. Information contained in this document is based on the latest information available at the time of printing and is subject to the copyright and other intellectual property rights of Audi of
America, Inc., its affiliated companies and its licensors. All rights are reserved to make changes at any time without notice. No part of this document may be reproduced, stored in a retrieval system, or transmitted
in any form or by any means, electronic, mechanical, photocopying, recording, or otherwise, nor may these materials be modified or reposted to other sites, without the prior expressed written permission of the
publisher.
Additional Information
All parts and service references provided in this TSB (2051242) are subject to change and/or removal.
©2019 Audi of America, Inc. All rights reserved. Information contained in this document is based on the latest information available at the time of printing and is subject to the copyright and other intellectual property rights of Audi of America, Inc., its affiliated companies and its licensors. All rights are reserved to make changes at any time without notice. No part of this document may be reproduced, stored in a retrieval system, or transmitted in any form or by any means, electronic, mechanical, photocopying, recording, or otherwise, nor may these materials be modified or reposted to other sites without the prior expressed written permission of the publisher.
SEOCONTENT-END
2051242/4
June 26, 2019
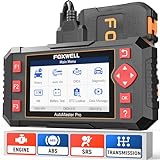
- [Easy to Use—Work Out of the Box] + [FOXWELL 2026 New Version] FOXWELL NT604 Elite scan tool is the 2026 new version from FOXWELL, designed for car owners who want to figure out the cause of issues before fixing car problems by scanning common systems like ABS, SRS, engine, and transmission. The NT604 Elite obd2 scanner diagnostic tool comes with the latest software—no need to waste time downloading software first. Plug the scanner into the OBDII port with OBDII cable to start the diagnosis.
- [Affordable] + [Reliable Car Health Monitor] Will you be confused what happens when the warning light of ABS/SRS/transmission/check engine flashes? Instead of taking your cars to dealership, this FOXWELL scanner will help you do a thorough scanning and detection for your cars and pinpoint the root cause. Note:The device is a diagnostic tool, not a repair tool. To turn off a warning light, you must first physically repair the issue causing it. Only then can the scanner be used to clear the corresponding fault code.
- [5 in 1 Car Diagnostic Scanner] Compared with obd scanners (50-100), NT604 Elite code scanner not only includes their OBDII diagnosis but also serves as ABS/SRS scanner, transmission and check engine code reader. When it’s an odb2 scanner, you can use it to check if your car is ready for annual test through I/M readiness menu. In addition, live data stream, built-in DTC library, data play back and print, all these features are a big plus for it. Note: doesn't support maintenance functions like reset or relearn. For the SRS system, NT604 Elite can read and clear common fault codes not caused by a crash, but crash/collision data cannot be cleared.
- [Fantastic AUTOVIN] + [No extra software fee] Through the AUTOVIN menu, this NT604 Elite car scanner allows you to get your V-IN and vehicle info rapidly, no need to take time to find your V-IN and input one by one. What's more, the NT604 Elite ABS SRS scanner supports 60+ car brands from worldwide (America/Asia/Europe). You don’t need to pay extra software fee. AUTOVIN may not work on some older vehicles or certain vehicle brands. If AUTOVIN fails, please input the vin code manually or go to the Diagnostic Menu to select your vehicle model.
- [Solid protective case KO plastic carrying bag] + [Lifetime update] Almost all same price-level car scanner diagnostic tool only offers plastic bag to hold the scanner.However, NT604 Elite automotive scanner is equipped with solid protective case, preventing your obd2 scanner from damage. Then you don’t need to pay extra money to buy a solid toolbox.


- CEL Doctor: The ANCEL AD310 is one of the best-selling OBD II scanners on the market and is recommended by Scotty Kilmer, a YouTuber and auto mechanic. It can easily determine the cause of the check engine light coming on. After repairing the vehicle's problems, it can quickly read and clear diagnostic trouble codes of emission system, read live data & hard memory data, view freeze frame, I/M monitor readiness and collect vehicle information
- Sturdy and Compact: Equipped with a 2.5 foot cable made of very thick, flexible insulation. It is important to have a sturdy scanner as it can easily fall to the ground when working in a car. The AD310 OBD2 scanner is a well-constructed mechanic tool with a sleek design. It weighs 12 ounces and measures 8.9 x 6.9 x 1.4 inches. Thanks to its compact design and light weight, transporting the device is not a problem. The buttons are clearly labelled and the screen is large and displays results clearly
- Accurate Fast and Easy to Use: The AD310 scanner can help you or your mechanic understand if your car is in good condition, provides exceptionally accurate and fast results, reads and clears engine trouble emission codes in seconds after you fixed the problem. This device will let you know immediately and fix the problem right away without any car knowledge. No need for batteries or a charger, get power directly from the OBDII Data Link Connector in your vehicle
- OBDII Protocols and Car Compatibility: Many cheap scan tools do not really support all OBD2 protocols. AD310 scanner as it can support all OBDII protocols such as KWP2000, J1850 VPW, ISO9141, J1850 PWM and CAN. This device also has extensive vehicle compatibility with 1996 US-based, 2000 EU-based and Asian cars, light trucks, SUVs, as well as newer OBD2 and CAN vehicles both domestic and foreign. Pls confirm with our customer service whether it is compatible with your vehicle before purchasing
- Home Necessity and Worthy to Own: This is an excellent code reader to travel or home with as it weighs less and it is compact in design. You can easily slide it in your backpack as you head to the garage, or put it on the dashboard, this will be a great fit for you. The AD310 is not only portable, but also accurate and fast in performance. Moreover, it covers various car brands and is suitable for people who just need a code reader to check their car

- 【Diagnose Check Engine Light in Seconds – No Mechanic Needed】The FOXWELL NT301 OBD2 scanner instantly reads & clears engine fault codes (DTCs) with one click. Simply plug into the 16-pin DLC port, turn ignition on, and get accurate results within seconds—No prior car knowledge required. Save hundreds on dealership fees by knowing exactly what’s wrong before you visit a shop. The #1 choice car scanner for DIYers and car owners who want to take control of their vehicle’s health
- 【Clear & Reset CEL with Confidence】Unlike cheap code readers that just erase codes temporarily, NT301 works like all professional vehicle code readers: It clears the check engine light only after you’ve fixed the underlying issue. If the problem isn’t fully repaired, the fault code will reappear. So you’ll never get a false pass. Use the foxwell scanner to verify your repair work and drive with peace of mind
- 【Sm-og Check Helper – Know Your Pass/Fail Status Before the Test】With dedicated one-click I/M readiness hotkeys and a simple Red-Yellow-Green LED indicator, you’ll instantly know if your vehicle is ready for annual testing. Built-in speaker provides clear audio feedback. No guesswork—just confidence before you head to the test center. One less thing to worry about when inspection day comes
- 【Advanced OBDII Modes – O- 2 Sensor & EVAP Testing】NT301 go beyond basic code reading with enhanced OBD2 modes. Run an EVAP system check to assess fuel tank condition, and use the O- 2 sensor test to optimize air-fuel ratio, boosting fuel economy, cutting em- issions, and saving you money at the pump. The code reader for cars and trucks is like having a mini em-issions lab in your glove box
- 【Live Data Graphing – Spot Engine Issues in Real Time】View and log live sensor data in easy-to-read graphs with this OBD2 scanner diagnostic tool. Monitor ox- ygen sensors, fuel trims, coolant temperature, RPM, and more to spot suspicious values instantly. This obd scanner gives you professional-grade insight without the pro price tag—a feature you won’t find on basic $20 car code readers
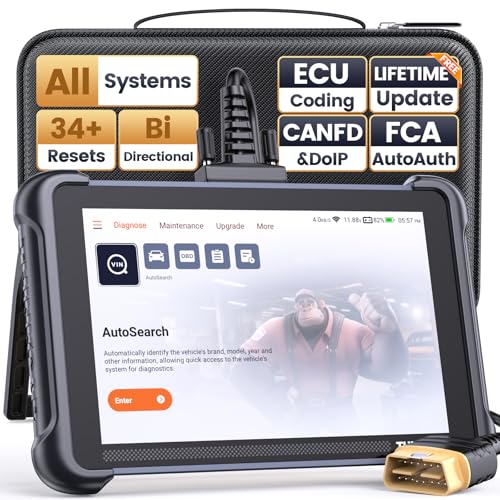
- 【Warm Tips】Dear friend, we've built this product to last, but in the unlikely event you encounter any technical hiccups, functions not support, received a used product, or just a simple question, please directly c0ntact us via Amazon Message and support @ mythinkcar. com, we're here to help and get it sorted in no time. Not sure if this product is compatible with your vehicle? Just e.mail your VIN at support @ mythinkcar. com for technical support. Note: FCA AutoAuth is a third-party service, additional cost may require.
- 【Professional Car Diagnostic Tool】Tired of renew fees? Thinkscan 689 scanner provides dealer-level advanced functions without annual fees for auto mechanics and repair shops. 34+ Services, 3000+ Active Test, ECU Coding, 140+ Brands Coverage, FCA AutoAuth, CANFD&DOIP Protocol, Component Matching, Power Balance, V.A.G Guided, Compatible with Google Chrome integration, etc. With strong hardware backing, 64G Memory, Android 10, 4-core processors, and 4150mAh battery. Thinkscan 689 brings you the best as your daily business helper and never lets you drop the ball!
- 【34+ Reset Service, Adaptation, Relearn, Calibration, Initialization, Matching】Made for workshops, Thinkscan 689 scanner provides 34+ services for worldwide vehicles: such as Gear/SAS/EPB/TPMS/D.P.F/BMS/ETS/Oil/Brake/AFS/GEARB0X/SUNROOF/SUS Reset, ABS Bleed, Injector coding, etc. Warm tips: Compatibility varies by car model, please reach out to us directly to make sure it works well on your cars.
- 【Real Active Test】Thinkscan 689 scan tool features over 3000+ full bi-directional control ability, to send commands to vehicle’s systems/components, to verify system input/output without using the vehicle's controls, e.g. turn on the radiator fan, modulate the throttle, open/close windows, operate mirrors, Injector Buz Test, turn on interior&exterior lights, sound horn, test door lock actuators, turn on/off front/rear side ACM Solenoid, Vehicle level position calibration, Wheel Speed Sensor Supply.
- 【Comprehensive Solutions with Advanced Features】Take your vehicle customization to the next level with the Thinkscan 689's advanced ECU coding capabilities. This scan tool provides power balance, PMI, unlock hidden features and enhance performance by activating dormant functions, customizing OE settings, matching replaced components, and reprogramming adaptive data to elevate your driving experience. Note: Compatibility varies by car models, please check before order.
- [All System Diagnostics, Professional-Level Scanner] - BLCKTEC 460T is the ultimate OBD2 diagnostic tool for home mechanics and professionals. It supports all 10 OBD2 modes, reads and clears Engine/Transmission/ABS/SRS codes, performs All-System Diagnostics, offers workshop reset tools, and provides real-time live data. It helps you pinpoint issues, assess your car's condition, and prepare for SMOG checks with ease. NOTE: Function availability depends on your vehicle. Before you buy, be sure to use the Compatibility Checker on BLCKTEC website or contact our customer support to verify that the features you need are supported for your vehicle’s specific year, make, and model.
- [12+ Most Popular Reset Functions] - BLCKTEC 460T OBD2 scanner offers 12+ dealer-level service functions, including Oil Maintenance Reset, ABS Bleeding, EPB Reset, SAS(Steering Angle Sensor) Recalibration, DPF(Diesel Particulate Filter) Reset, Throttle Body Relearn, Battery Reset/Initialization, TPMS Relearn, Transmission Reset, Fluid Change Reset, Maintenance Reset and more, enabling you to perform workshop services like a pro. NOTE: Function availability depends on your vehicle. Be sure to use the Compatibility Checker on BLCKTEC website to verify that the features you need are supported for your vehicle.
- [Real-Time OBD2 and OEM Live Data, Freeze Frame Data] - BLCKTEC 460T helps diagnose vehicle issues when warning lights like Check Engine Light or ABS/SRS Light appear. It offers detailed DTC info, ECU Freeze Frame Data, and real-time OBD2 and advanced OEM live data, including Engine, Transmission, ABS, SRS, and more, making it easy to diagnose and resolve vehicle problems. You can view, graph, record, replay, and overlay up to four live data streams in a single graph for better analysis.
- [AutoVIN, AutoReLink, AutoScan, 3X Faster] - Equipped with AutoVIN technology, 460T automatically retrieves the VIN to save you time. Its AutoScan and AutoReLink features scan all of the vehicle's ECUs and detect any fault codes immediately after you plug the scanner into the vehicle's OBD2 port - no button presses required. Additionally, it regathers DTC and I/M readiness information every 30 seconds, simplifying monitor tests. 460T's advanced technology makes it 3X faster than other products.
- [Get RepairSolutions2, the #1 Auto Repair App for Free] - When paired with RepairSolutions2(RS2) App, 460T becomes even more powerful. RS2's Verified Fix Database built by master technicians, provides the parts needed for the repair. Additionally, RS2 gives you access to OEM warranty info, maintenance schedules, TSB, and dealership recall info, making car care easier than ever. RS2 is free with no subscription fees and it stores your car scan reports in the cloud, allowing you to access, share, or print them anytime and anywhere.
This product presentation was made with AAWP plugin.